Connect Barcode Printers
Configuring Barcode Printer in the POS App
To connect a compatible barcode printer to a POS terminal through USB interface, the following steps should be followed (If the POS terminal is a tablet or a phone, a USB OTG cable or connected should be used).
Connect the USB cable of barcode printer to the POS terminal and switch on the POS terminal and barcode printer.
Follow barcode printer user’s manual to insert carbon and label rolls to the barcode printer and do necessary calibrations.
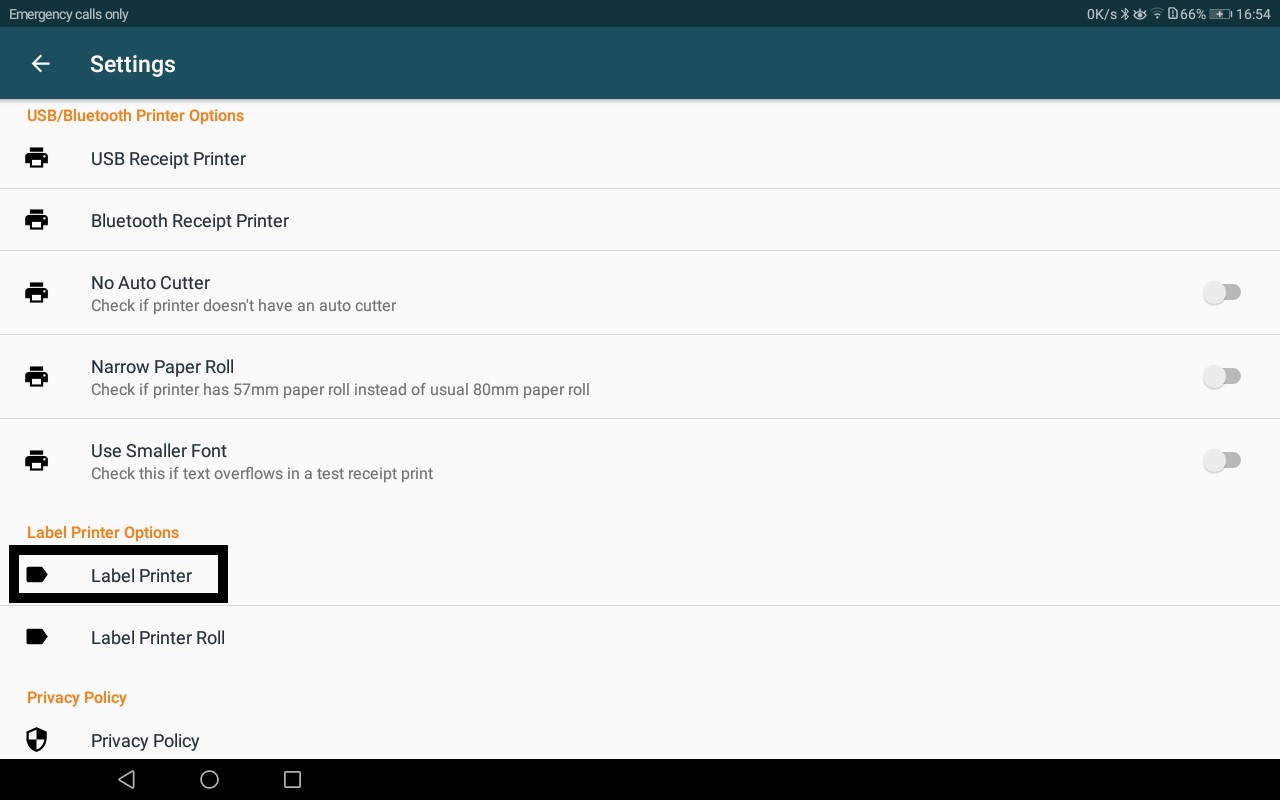
Select barcode printer:
  POS App -> Side Menu -> Setting -> Locate the Setting,
      “Label Printer” under the group “Label Printer Options”
In the popup select the correct USB device for barcode printer.
Locate label printer config:

Select label printer:

Configuring Sticker Roll Size in the POS App
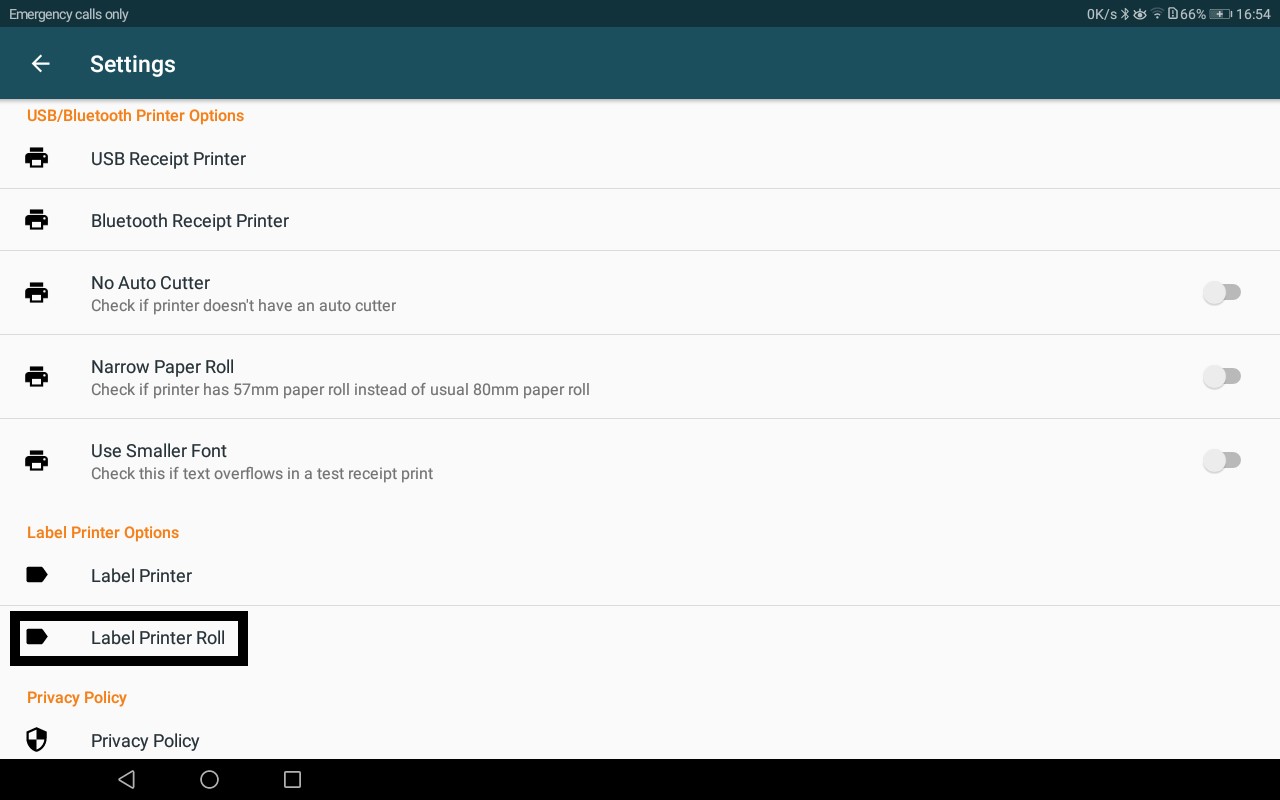
POS App -> Side Menu -> Setting -> Locate the Setting,
    “Label Printer Roll” under the group “Label Printer Options”
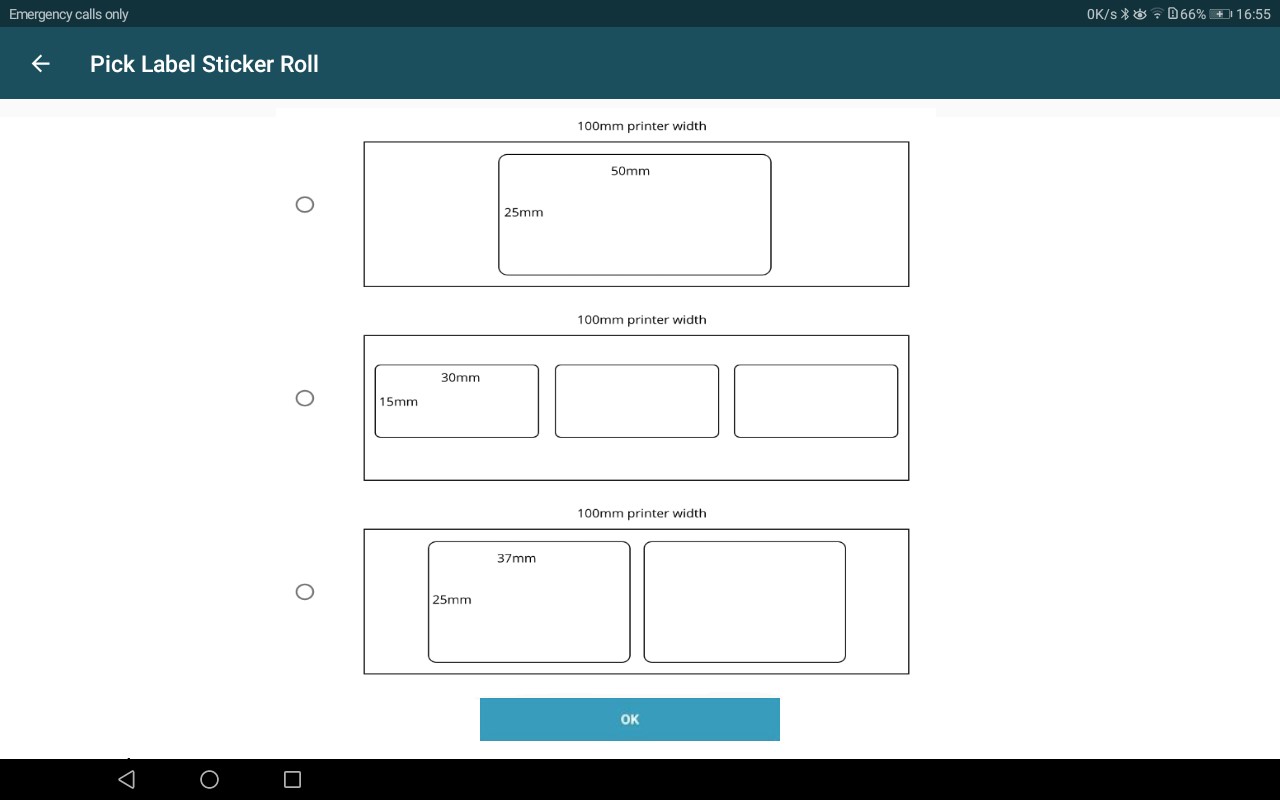
In the new window, select the dimensions of barcode printer rolls which are expected to be used and click OK.
Locate Label Roll Config:

Select Roll Size :

Now you can print barcode lables with the configured barcode printer and sticker roll.
