Setup Customers from Back-Office
Customers Screen
Associated Permissions: View Customers

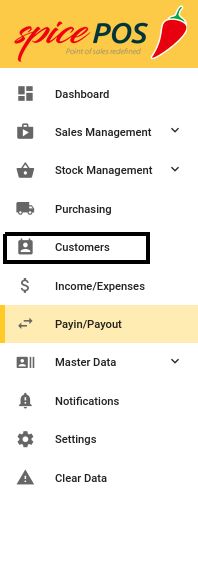
Back-Office -> Side Nav -> Customer management -> Customers
| Locating Customers Screen | Customers Screen |
|---|---|
 | 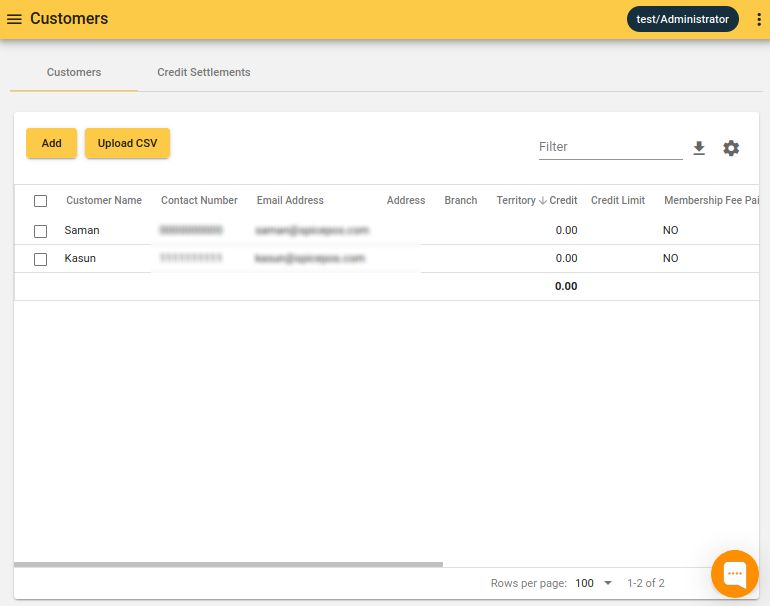 |
| Number | Field Name | Description |
|---|---|---|
| 1 | Add | Add customer from front-end |
| 2 | Upload CSV | Upload customers file |
| 3 | Columns - Customer Details | Name, phone number, adress, email address |
| 4 | Columns - Customer Credit | Outstanding customer credit balance |
| 5 | Columns -Blacklisting Details | Blacklisted, blacklisted Time, Blacklisted Reason |
Add a Customer
Associated Permissions: Add Customers

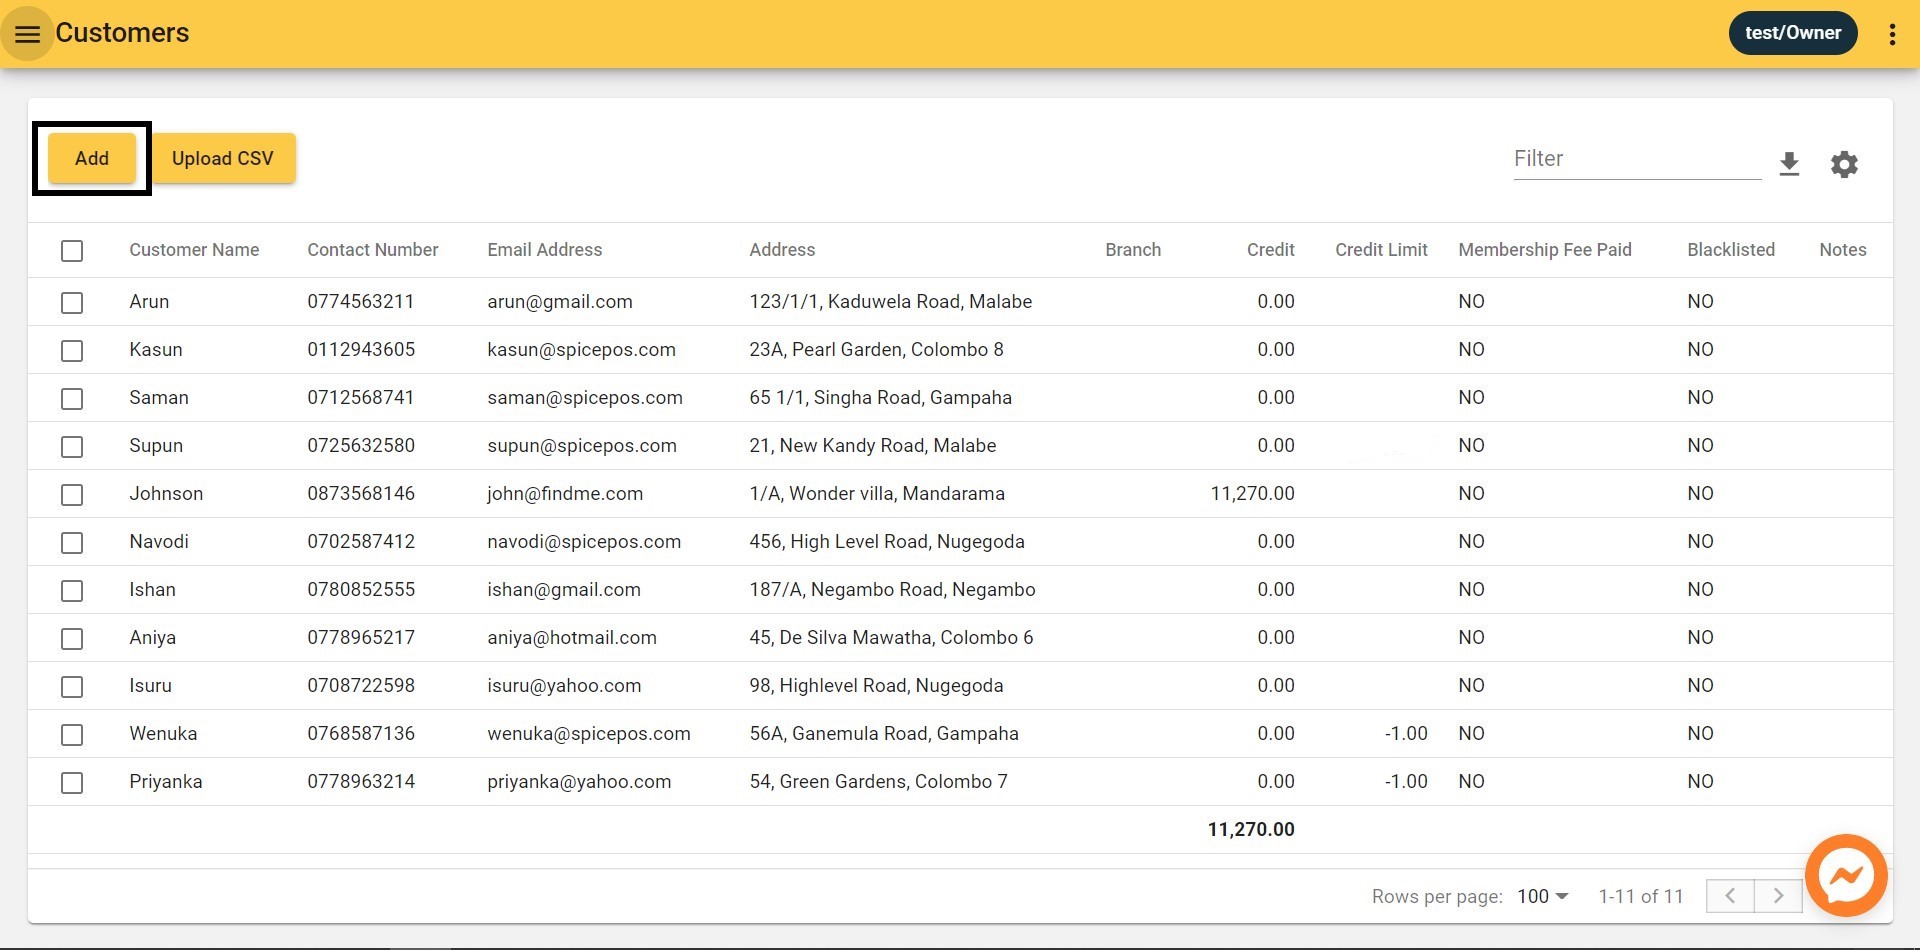
Back-Office -> Customers screen -> Click "Add" button -> Fill in details -> Save
Click "Add" button from customers screen:
Fill in details & save:
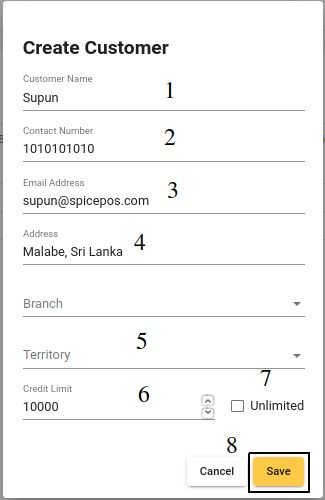
| Number | Field Name | Description |
|---|---|---|
| 1 | Customer Name | Customer name as displayed in POS app, printed bill and Back-Office. |
| 2 | Contact Number | Phone number of the customer. |
| 3 | Email Address | Email address of the customer. |
| 4 | Address | Address of the customer. |
| 5 | Territory | Explained in the section “Setup Territories” |
| 6 | Credit Limit | Optional credit limit for customer. If specified can’t issue bills to the customer with credit balance exceeding the specified limit. However a user with “Exceed Credit Limit” permission can exceed the credit limit in billing. |
| 7 | Unlimited Credit | Allow unlimited credit limit to Customer. |
| 8 | Save | Confirm customer add. |
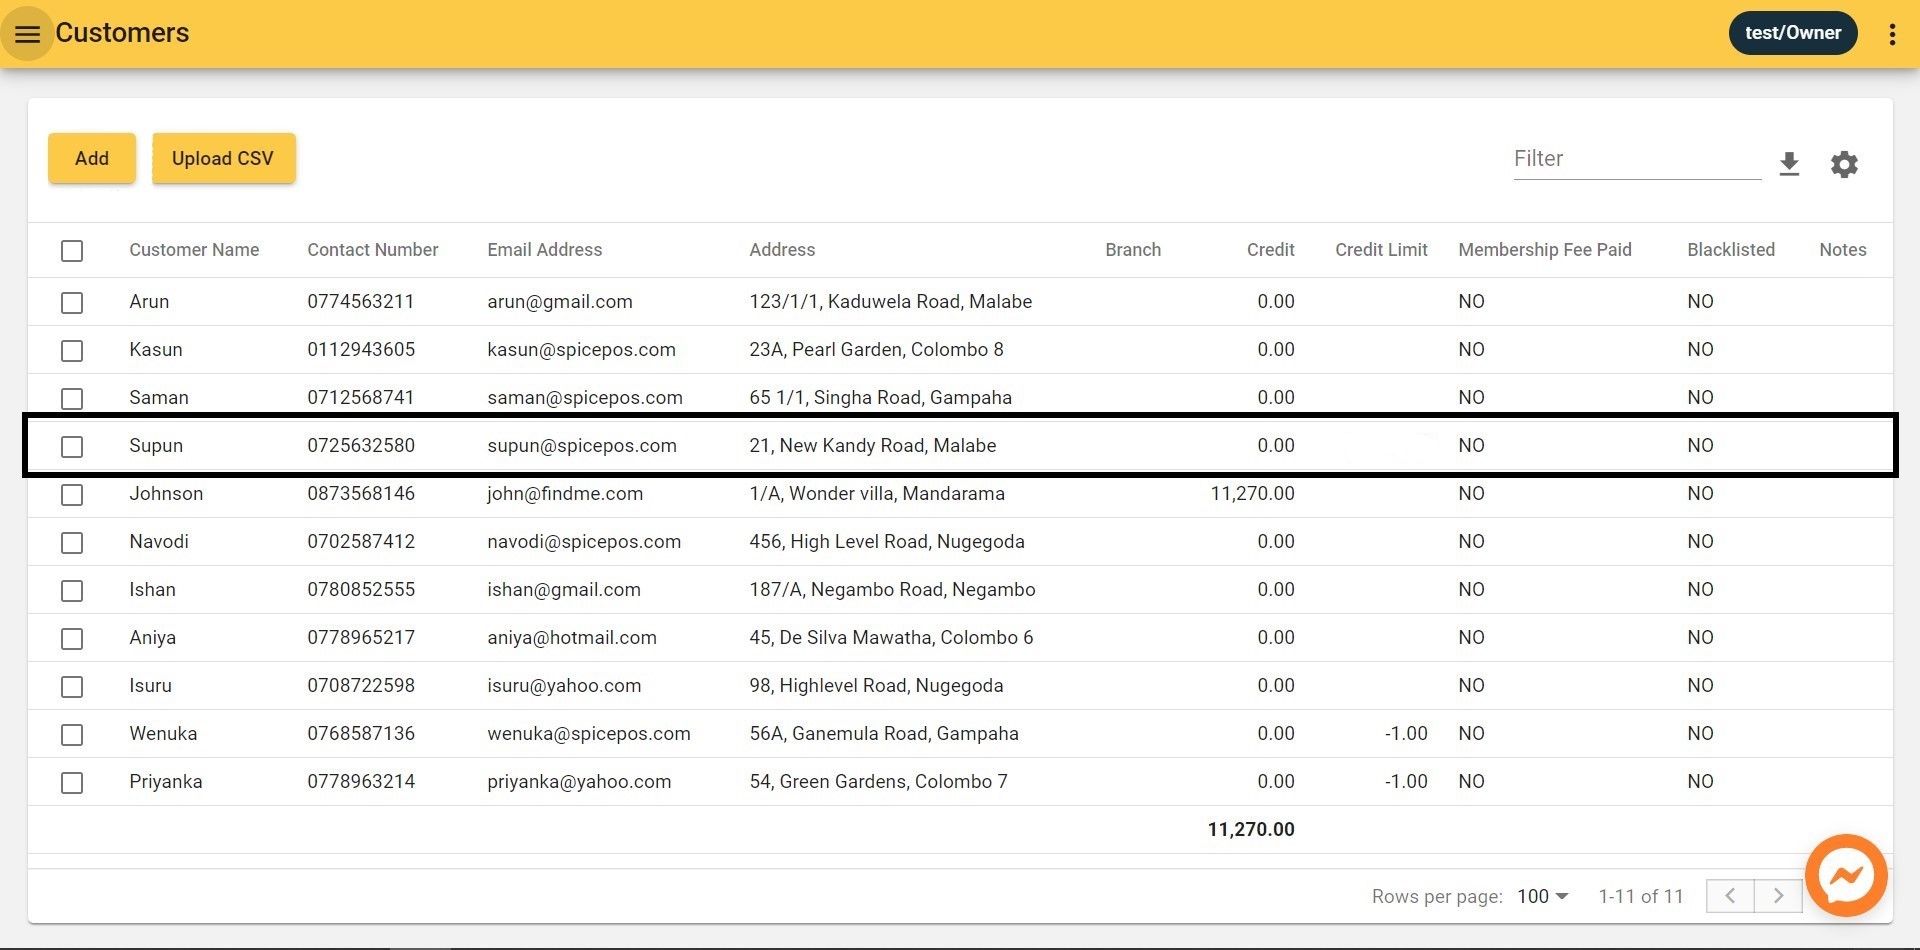
Customer added:
Edit a Customer
Associated Permissions: Edit Customers

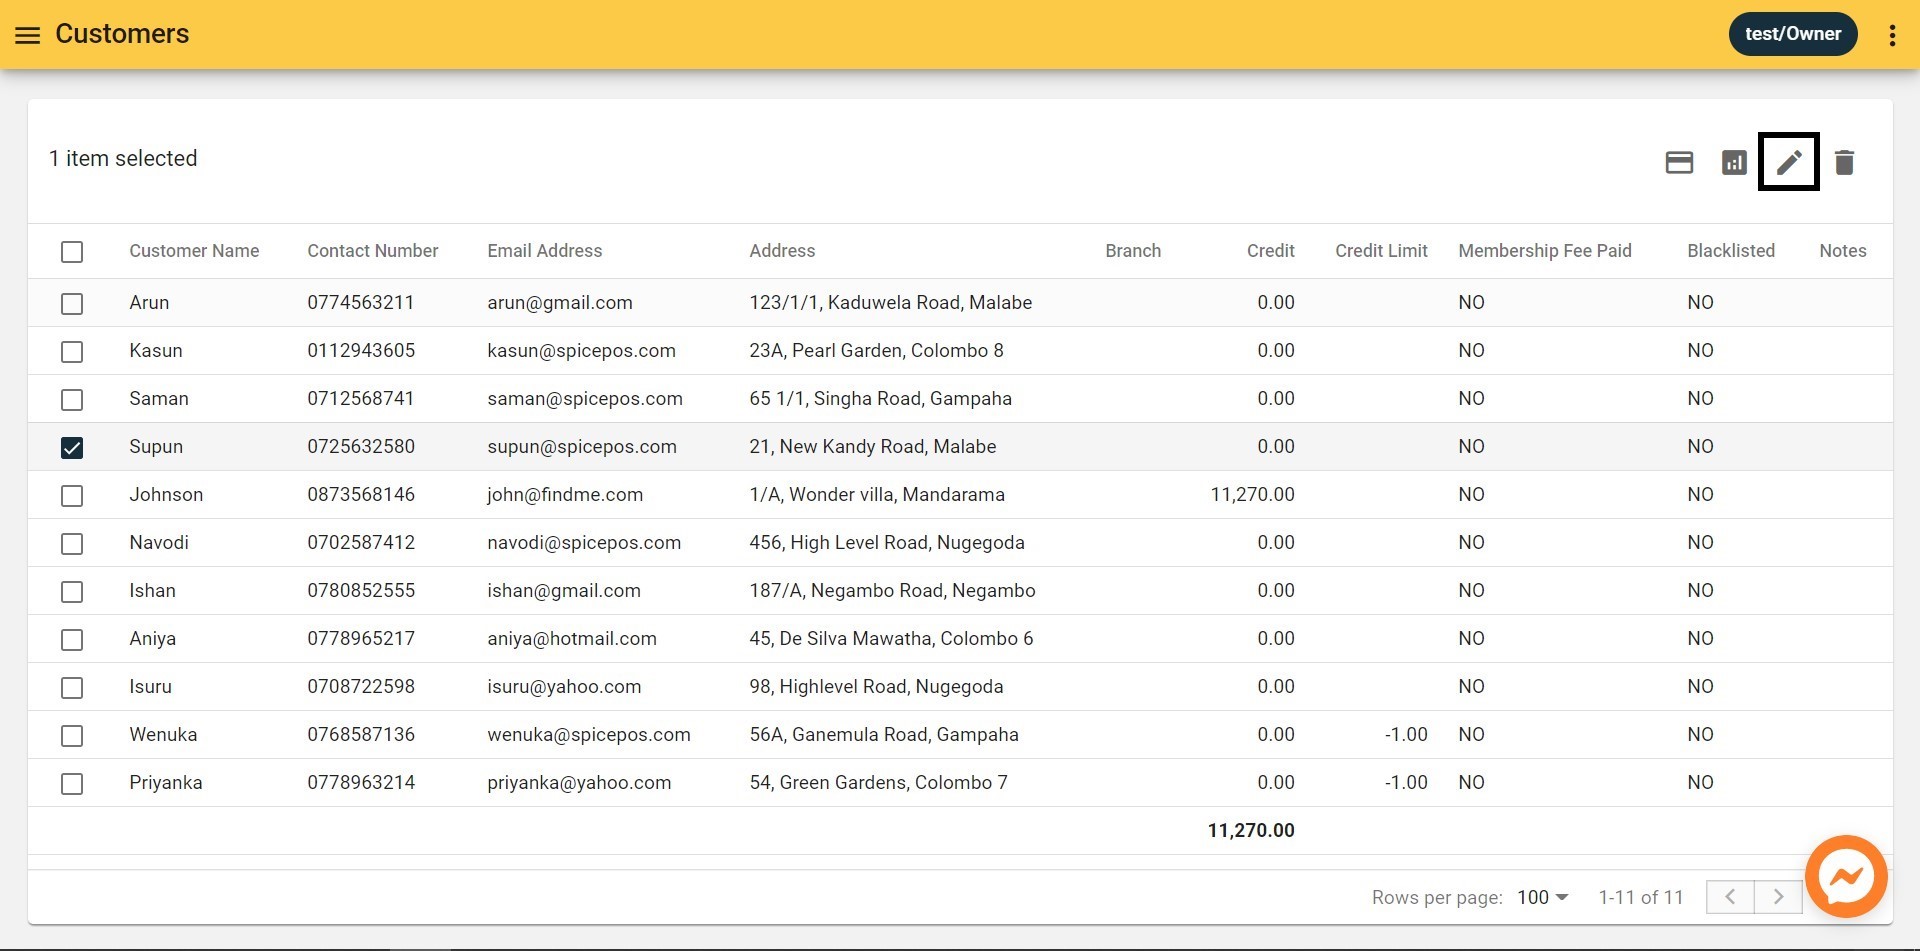
Back-Office -> Customers screen -> Select customer from checkbox -> Click "Pencil" icon -> Edit details -> Save
or
Back-Office -> Customers screen -> Click on customer -> Edit details -> Save
Select customer click "Pencil" icon:
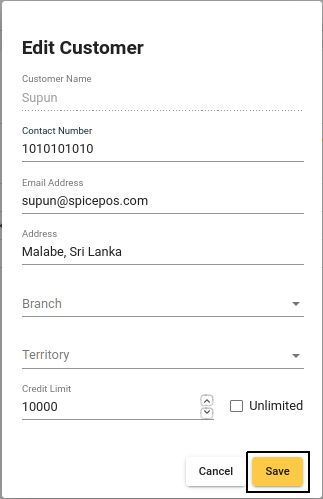
Edit details & save:
Delete a Customer
Associated Permissions: Delete Customers

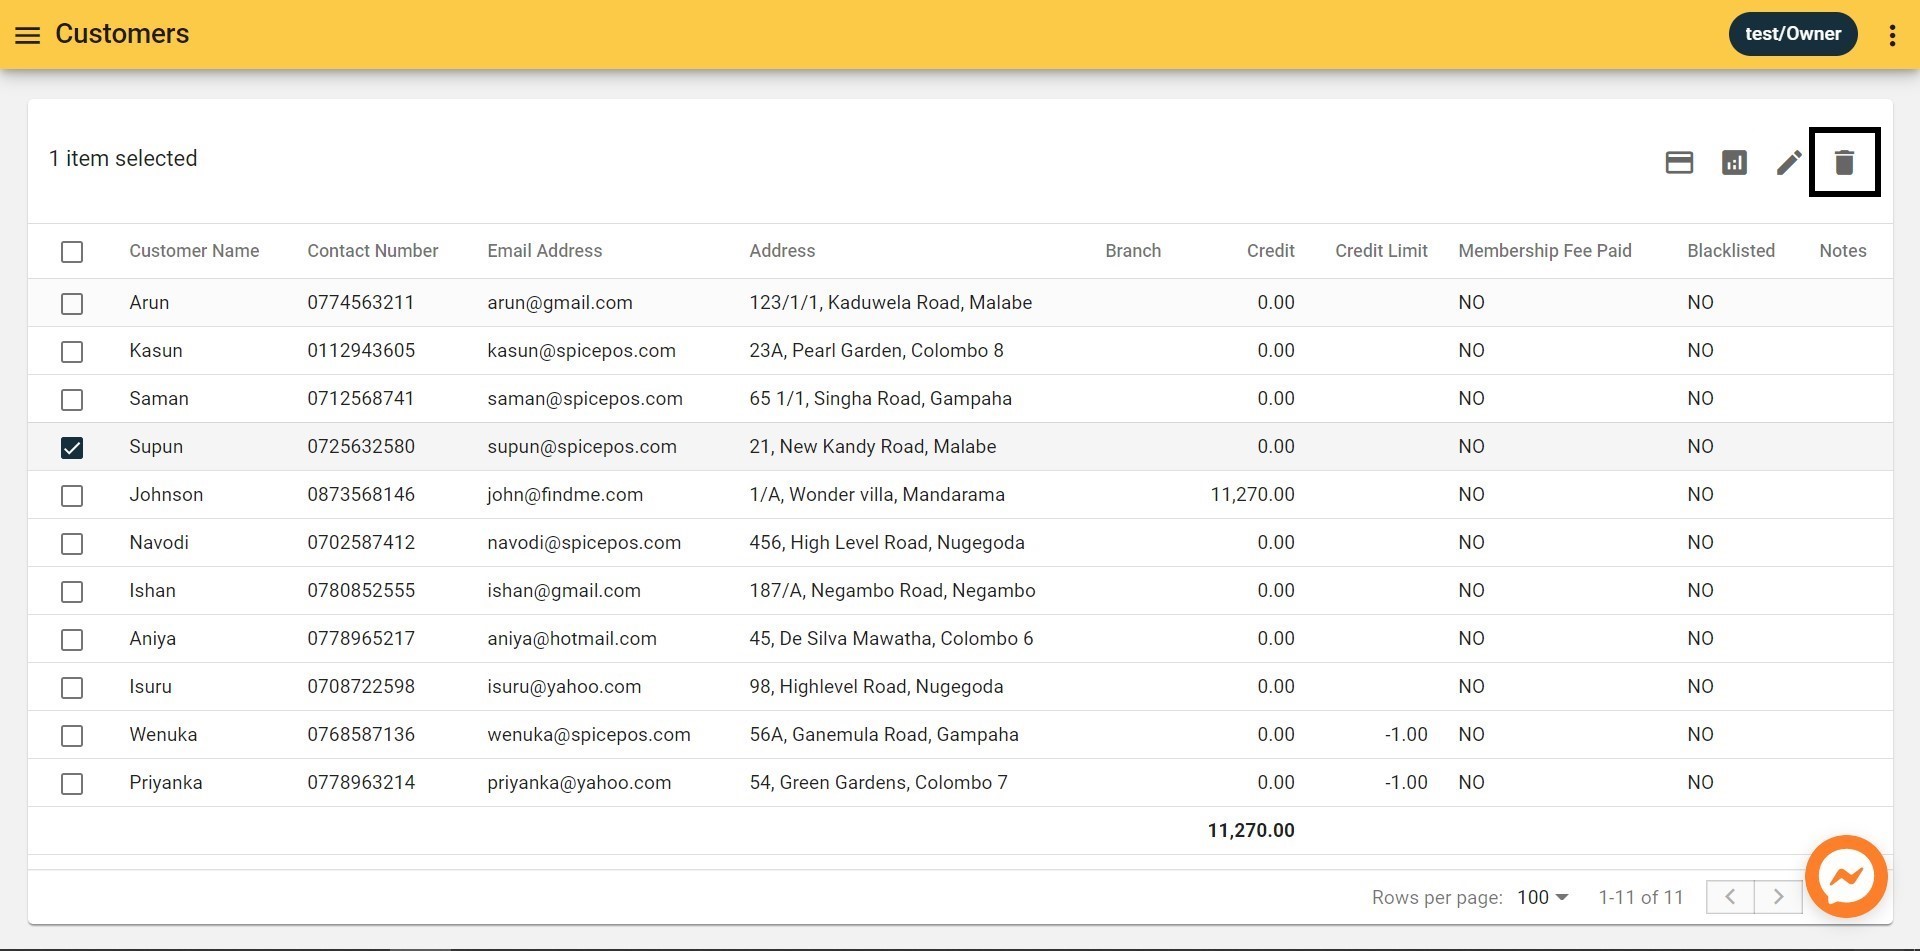
Back-Office -> Customers screen -> Select customer from checkbox -> Click "Bin" icon -> Confirm delete
Select customer click "Bin" icon:
Confirm delete:
