Individual Inventory Actions
Individual Stock Transactions namely Add, Withdraw and Transfer can be performed from the Inventory screen or the Item Inventory screen.
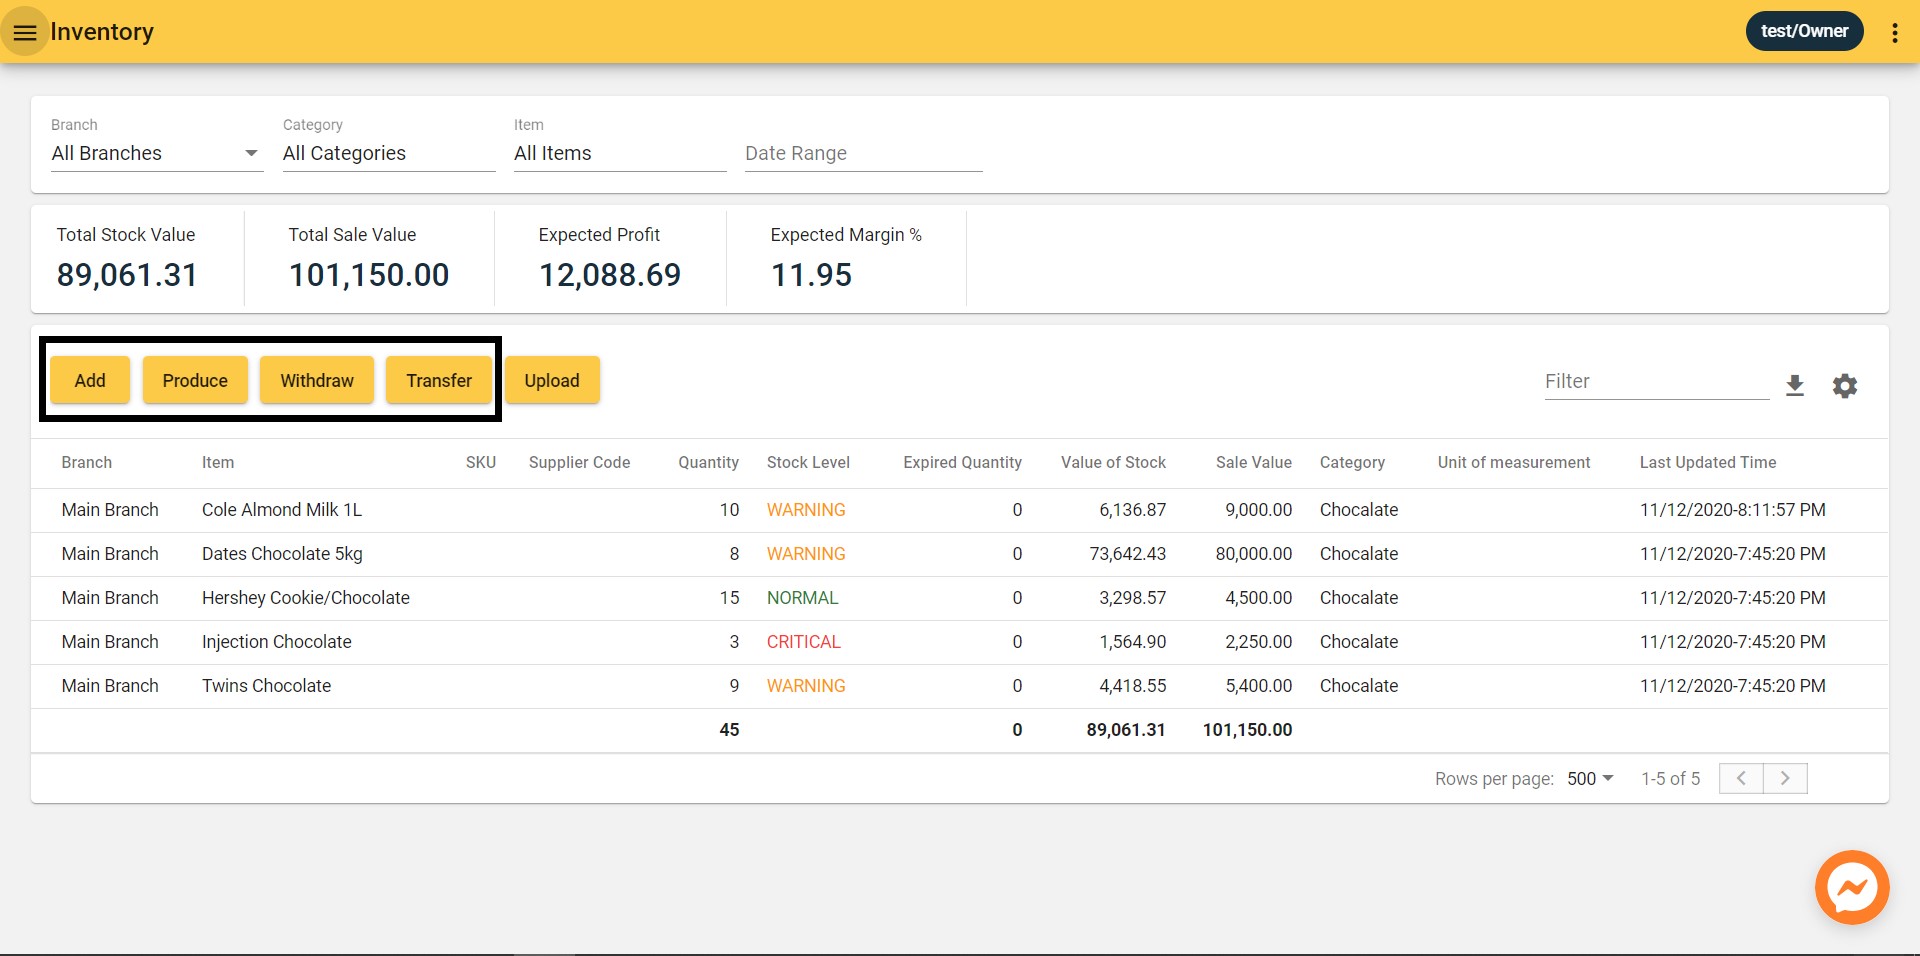
Individual Stock Actions in Inventory Screen:
Individual Stock Actions in Item Inventory Screen:
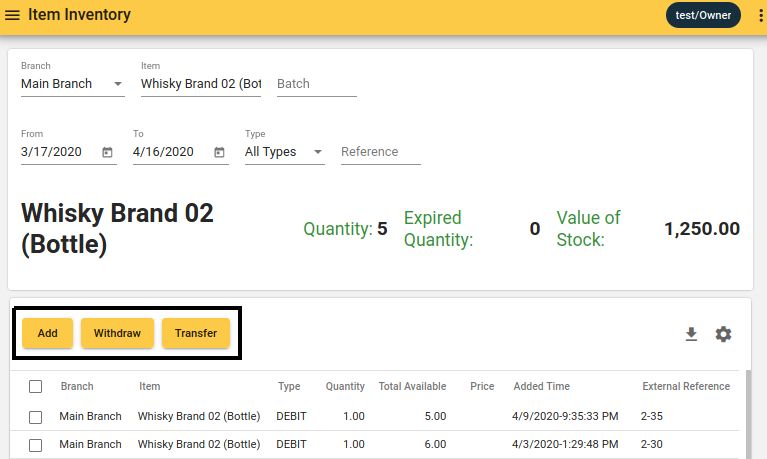
Only Difference between these two entry points is, when a stock Transaction is initiated from Item Inventory screen, The Item and Branch fields get automatically filled with that of the Item Inventory.
All three of these Transaction Types can alter the stock of one Item at a Time. For bulk stock updates either a file upload or a bulk stock transaction (Purchase Bill, Stock Issuance, Stock Take or Supplier Return) should be used.
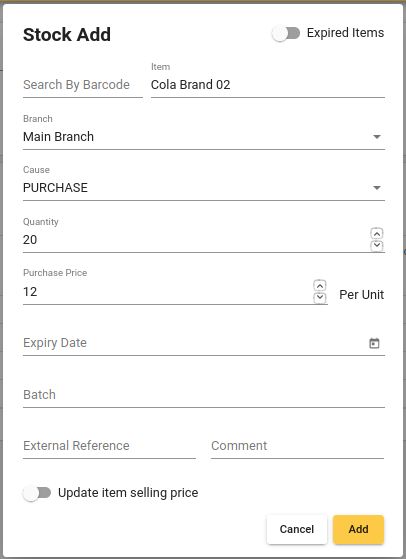
Stock Add
| Field Name | Is Mandatory | Description |
|---|---|---|
| Item | YES | Item Name. Type in and select from options. |
| Branch | YES | Branch to which stock is added. |
| Cause | YES | Cause for Stock Add. |
| Quantity | YES | Quantity to add. |
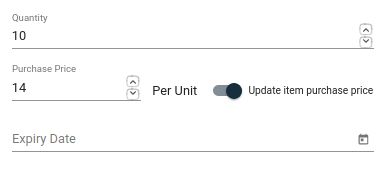
| Purchase Price | NO | Purchase Price of stock Item. As the form loads, Purchase Price is picked from the same field of the Item. If the actual stock price is different, it can be overridden. |
| Expiry Date | NO | Expiry data of stocks. |
| Batch | NO | Batch ID for stock actions. |
| External Reference | NO | Bill number if present. |
| Comment | NO | Reason for Stock Add |
The “Add” button in the Stock Add Popup can be clicked after filling the form to confirm Stock Add.
Toggle Switches & Conditional Sections
Expired Items Toggle - If the added Items are already expired (in case the user is adding for tracking purposes) this toggle should be switched on.
Update Item Selling Price Toggle - If the User notices a price change of new stock and the User needs to Update Selling Price of the Item at the same time this toggle should be switched on.
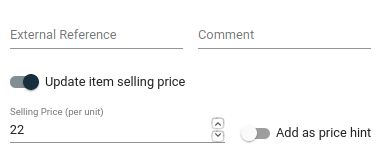
New Selling Price can be entered in the Selling Price field that appears.
If the “Add as price hint” toggle is switched on, the new Selling Price will be updated in the Item as a Price Hint.
When Purchase Price is overridden - “Update item purchase price” toggle appears. If checked, the updated Purchase price will be saved in the Item.
Stock Withdraw

| Field Name | Is Mandatory | Description |
|---|---|---|
| Item | YES | Item Name. Type in and select from options. |
| Branch | YES | Branch to Withdraw stock. |
| Cause | YES | Cause for Stock Withdrawal. |
| Quantity | YES | Quantity to be withdrawn. |
| Batch | NO | Batch ID for stock actions. |
| External Reference | NO | Bill number if present. |
| Comment | NO | Reason for Stock Withdraw. |
The “Withdraw” button in the Stock Withdraw Popup can be clicked after filling the form to confirm Stock Withdraw.
Expired Items Toggle - If the withdrawn Items are expired this toggle should be switched on.
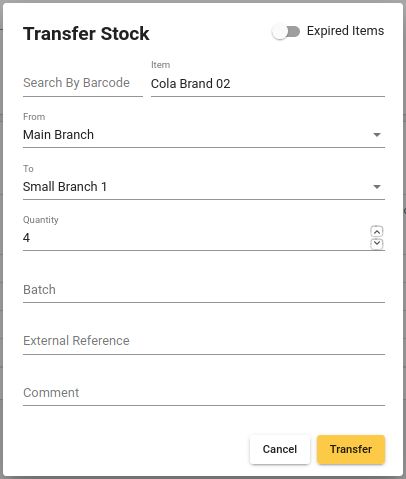
Stock Transfer
| Field Name | Is Mandatory | Description |
|---|---|---|
| Item | YES | Item Name. Type in and select from options. |
| From Branch | YES | Branch of Stock Deduction from the Transfer. |
| To Branch | YES | Branch of Stock Addition from the Transfer. |
| Quantity | YES | Quantity of stock to be transferred. |
| Batch | NO | Batch ID for stock actions. |
| External Reference | NO | Bill number if present. |
| Comment | NO | Reason for Stock Transfer. |
The “Transfer” button in the Transfer Stock window can be clicked after filling the form to confirm Stock Transfer.
Expired Items Toggle - If the transferred Items are expired this toggle should be switched on.