Setup Items through Back-Office
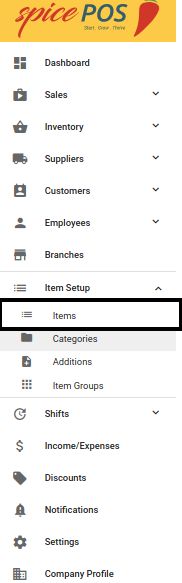
Items Screen
Back-Office -> Side Navigation Menu -> Master Data -> Items
| Locate items screen from side nav | Items screen |
|---|---|
 | 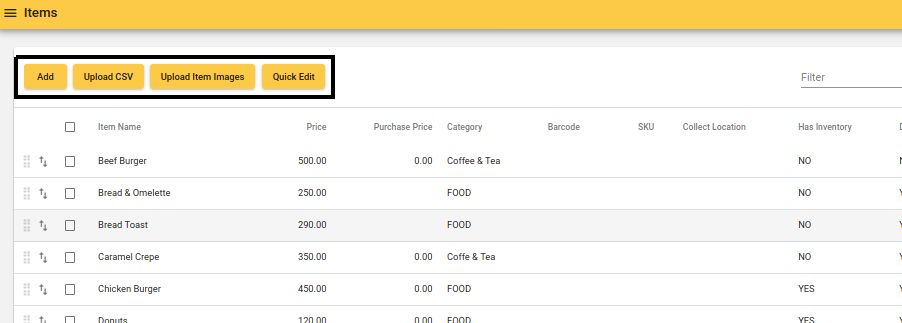 |
| Number | Button | Description |
|---|---|---|
| 1 | Add | Add an item from the front-end. |
| 2 | Upload CSV | Upload items file to add/edit items. |
| 3 | Upload item images | Upload images for multiple items at once. Saves time in adding images to a large set of items. |
| 4 | Quick Edit | Edit multiple items at once. Saves time in a bulk edit. |
Add a New Item
Items Screen -> Click "Add" button -> Fill in details -> Save
Item has a large number of different fields. So they are organized into few Sections. Save button at the bottom of the screen should be clicked in order to complete item Add.
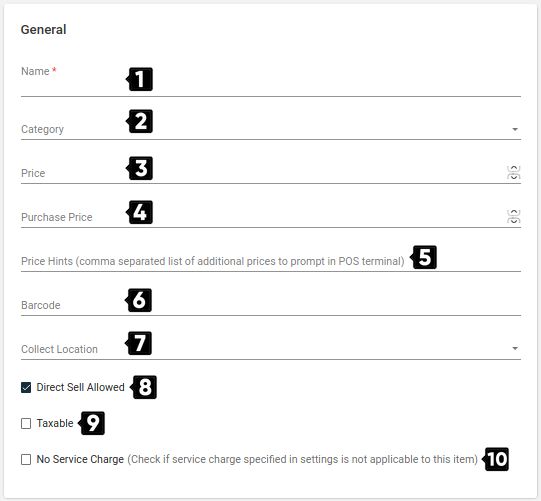
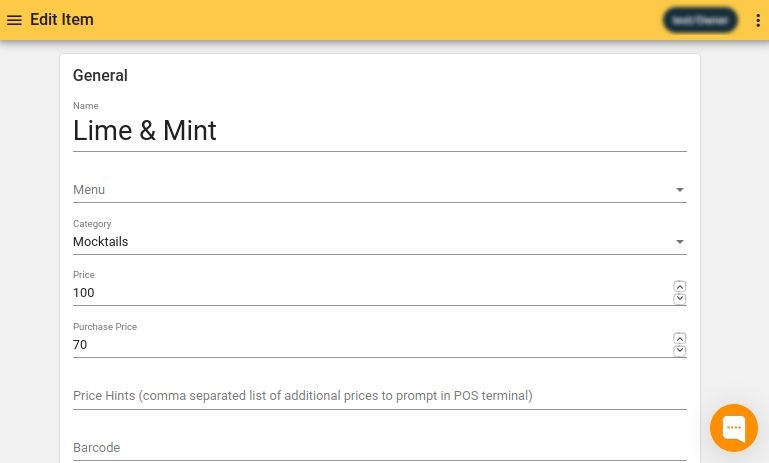
General section
| Number | Field name | Description |
|---|---|---|
| 1 | Item name | Name that appear in app sales window, printed bill and reports |
| 2 | Category | Category to which item belongs |
| 3 | Selling price | Price of the item in POS |
| 4 | Purchase price | Cost price of the item |
| 5 | Price hints | Comma separated list of other selling prices for this item. Specified in case of older batches of the same item exist and they are intended for sold at different prices compare to the selling Price. Ex: 250, 275, 300 |
| 6 | Barcode | Item barcode read from barcode scanner. Value is a string. |
| 7 | Collect location | Where the order would be printed in case of a restaurant. (Only applicable for restaurants, for other businesses this field is not available). Possible values: kitchen/bar |
| 8 | Direct sell allowed | Same meaning as in the POS app (as described before). If checked, this item would be listed for sales in the POS sales screen. |
| 9 | Taxable | If txes are defined at business or branch level, unchecking this would exempt this item from being considered for tax calculation. |
| 10 | No service charge | If service charge is configured at business or branch level, checking this would exempt this item from being considered for service charge. |
Note: 7 and 10 are Restaurant specific features and can be ignored for other businesses.
Inventory Sections
Expanded only if the “has inventory” flag is checked.
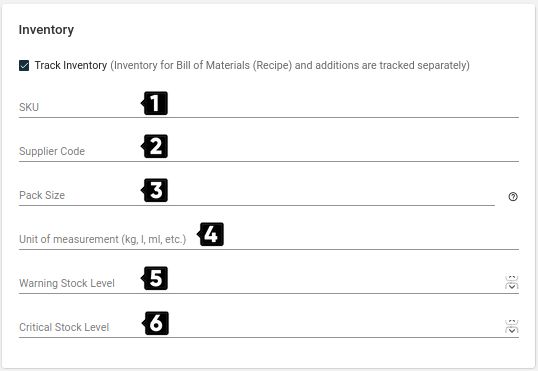
| Number | Field Name | Description |
|---|---|---|
| 1 | SKU | Stock keeping unit (Item is tracked in the business using this code). |
| 2 | Supplier code | Supplier SKU. Supplier tracks this item based on this code. Supplier does not know the SKU. |
| 3 | Pack size | If the item is purchased in packs how many items in a pack. |
| 4 | Unit of measurement | Free text field containing unit of item. This value will appear in inventory screens against the item name making it easy to track stocks. |
| 5 | Warning stock level | Once stock is reached this value a stock warning ntification is given saying now your stock for the item is running low. |
| 6 | Alert stock level | Once stock reaches below this value stock alert notifications are given to inform that the stock of the item is critically low and need to be refilled quickly. |
Informative Section
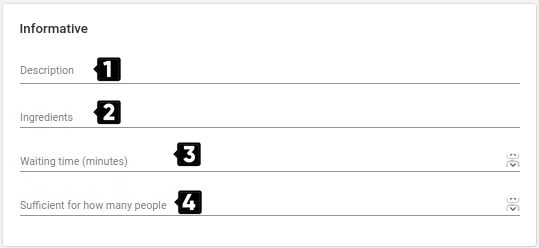
| Number | Field Name | Description |
|---|---|---|
| 1 | Description | Description of item. Ex: if it’s a dish you can describe how it taste and smell. |
| 2 | Ingredients | List of ingredients, their quality and their origins. |
| 3 | Waiting time (minutes) | How long would it take for preparation. |
| 4 | Sufficient for how many people | For how many people a dish is sufficient for. |
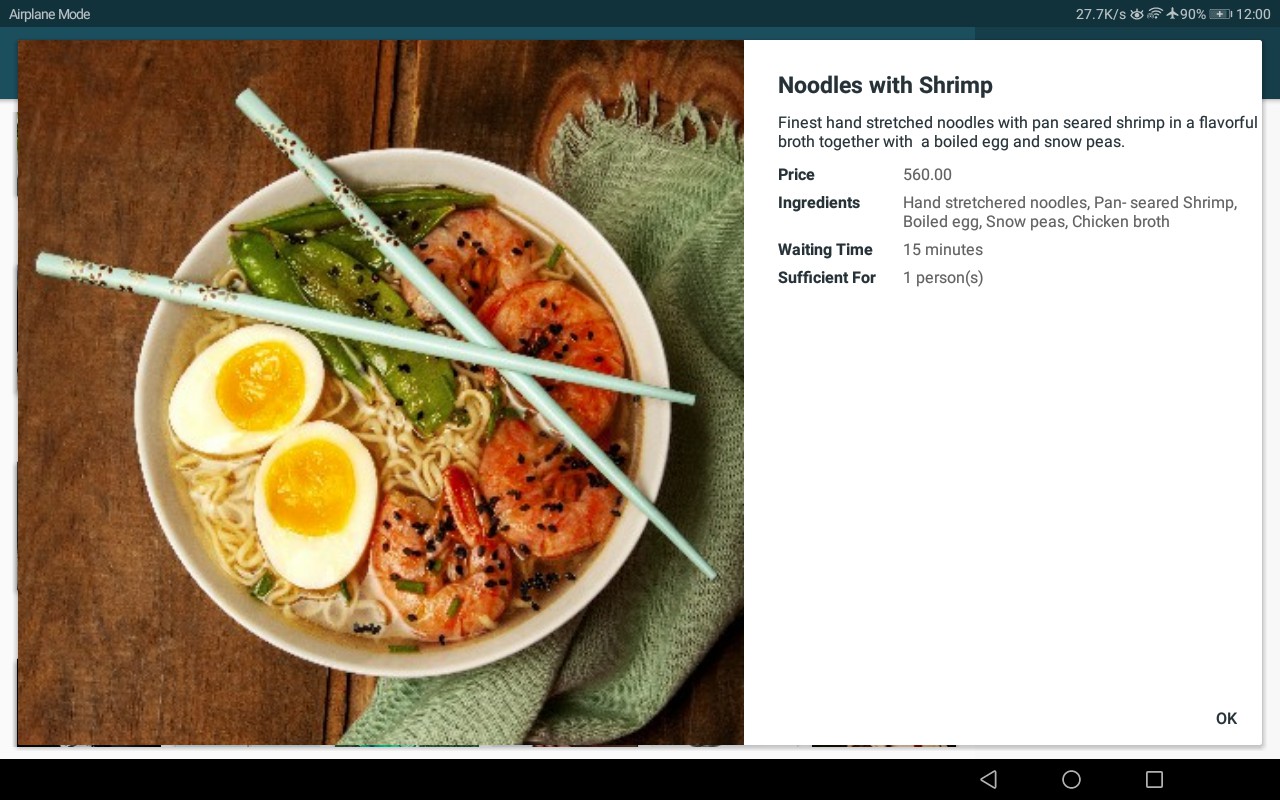
Details entered in this section will be shown in the POS app when 'info' button of an item is clicked. This information is generally useful for salespeople to communicate or show to customers. Especially for restaurant stewards.
Color/image Section
Defines how an item is shown in the POS sales screen.
Color:
Choose color fom the available set of colors.
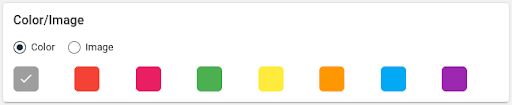
Image:
Select an image you have already downloaded. Image size: 400 x 400

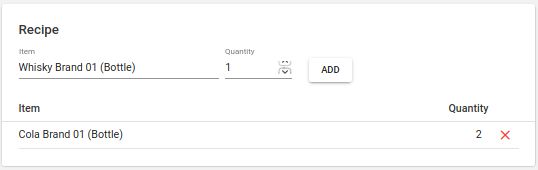
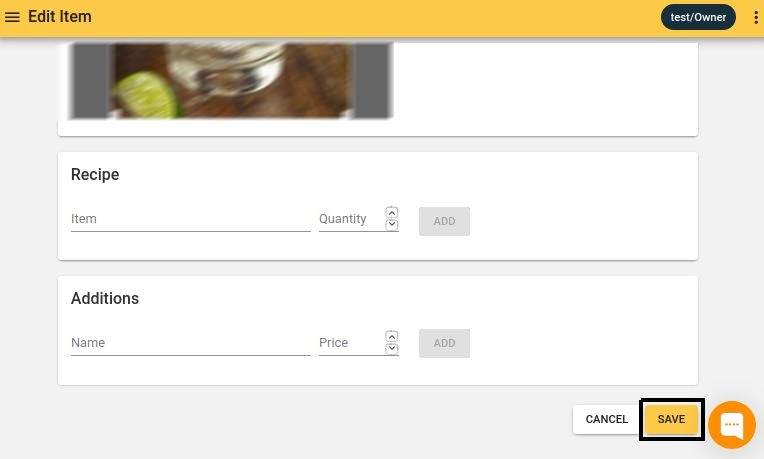
Receipe Section
This generally applies to items which are produced for sales. This is where the ingredient list is specified with the exact quantities required for a unit of the item created.
Ex: Items: Chicken salad
    Ingredients:
        Chicken         : 200g
        Eggs            : 1
        Salad leaves    : 100g
        Salt            : 5g
Additionally this can be used for tracking inventory in the case of selling portions of a particular stock item.
Ex:
    Item 1: Whisky brand 1 bottle (inventory tracked in ml. Ex: for 750 ml bottle stock is incremented by 750)
    Item 2: Whisky brand 1 50ml (inventory linked to item 1)
        Bill of materials:
            Whisky brand 1 bottle     : 50 ml
Additions Section
Additions with or without additional price can be specified for each item. If you specify additions which only apply to the currently adding item, this option can be used. For configuring the same set of additions across multiple devices, the additions window can be used. That's explained under a seperate topic.
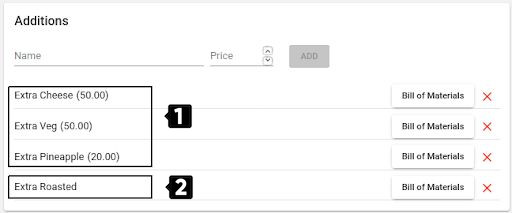
| Number | Description |
|---|---|
| 1 | Additions with price - The price of selected additions will add up to the item price in bill. |
| 2 | Additions with no price - Original item price will not be altered by selecting this kind of addition. |
Selecting additions:
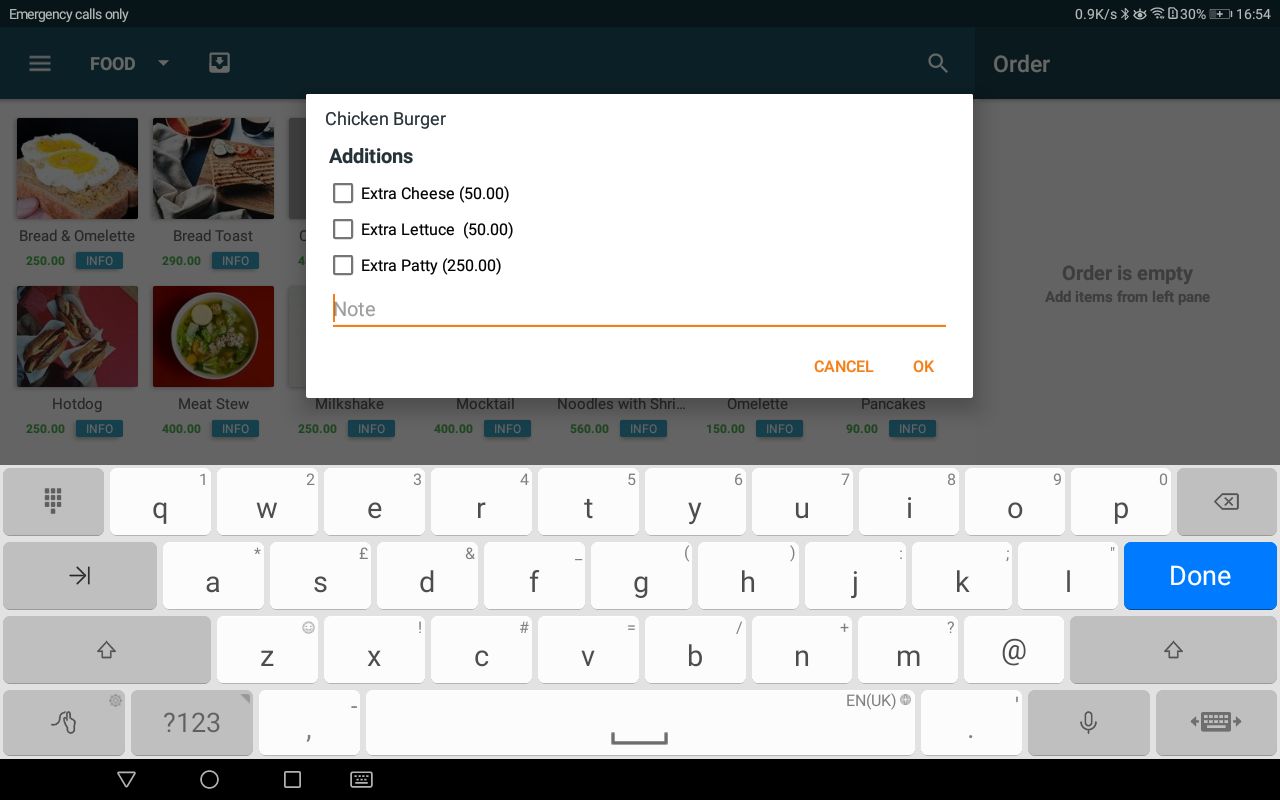
Selected additions in order:

| Additions in KOT | Additions in printed bill |
|---|---|
 |  |
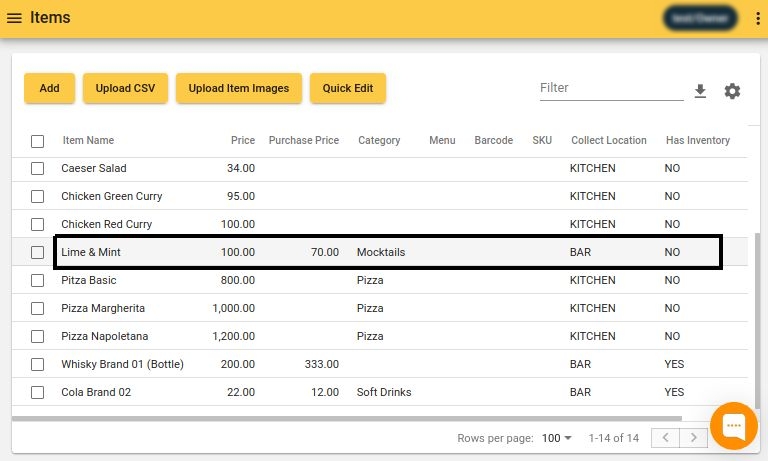
Edit an Item
Items Screen -> Click on Item -> Edit details -> Save
Upon clicking save button at the bottom of item add screen, the modifications will be validated and saved.
Click item:
Edit details:
Save:
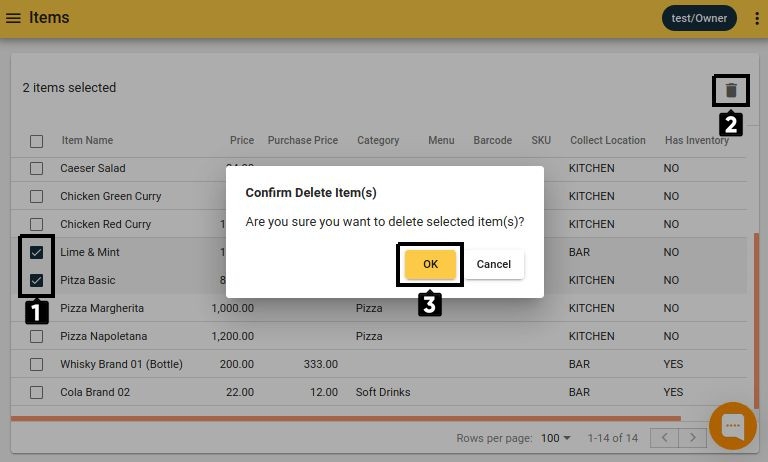
Delete an Item/(s)
Items Screen -> Select Item/(s) -> Click Delete icon -> Confirm
Select Item, Click bin icon & confirm: