Giving Manual Discounts
Associated Permission: Discount
Item Level Discounts
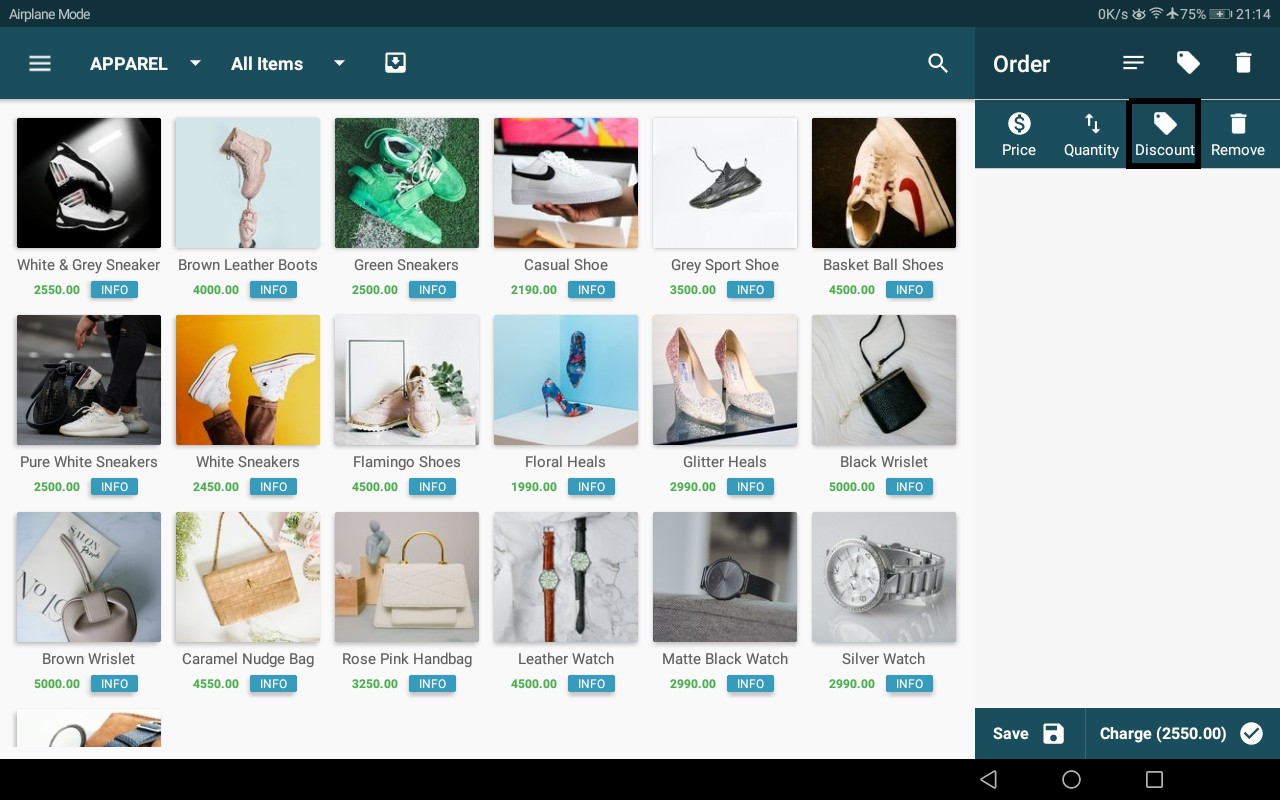
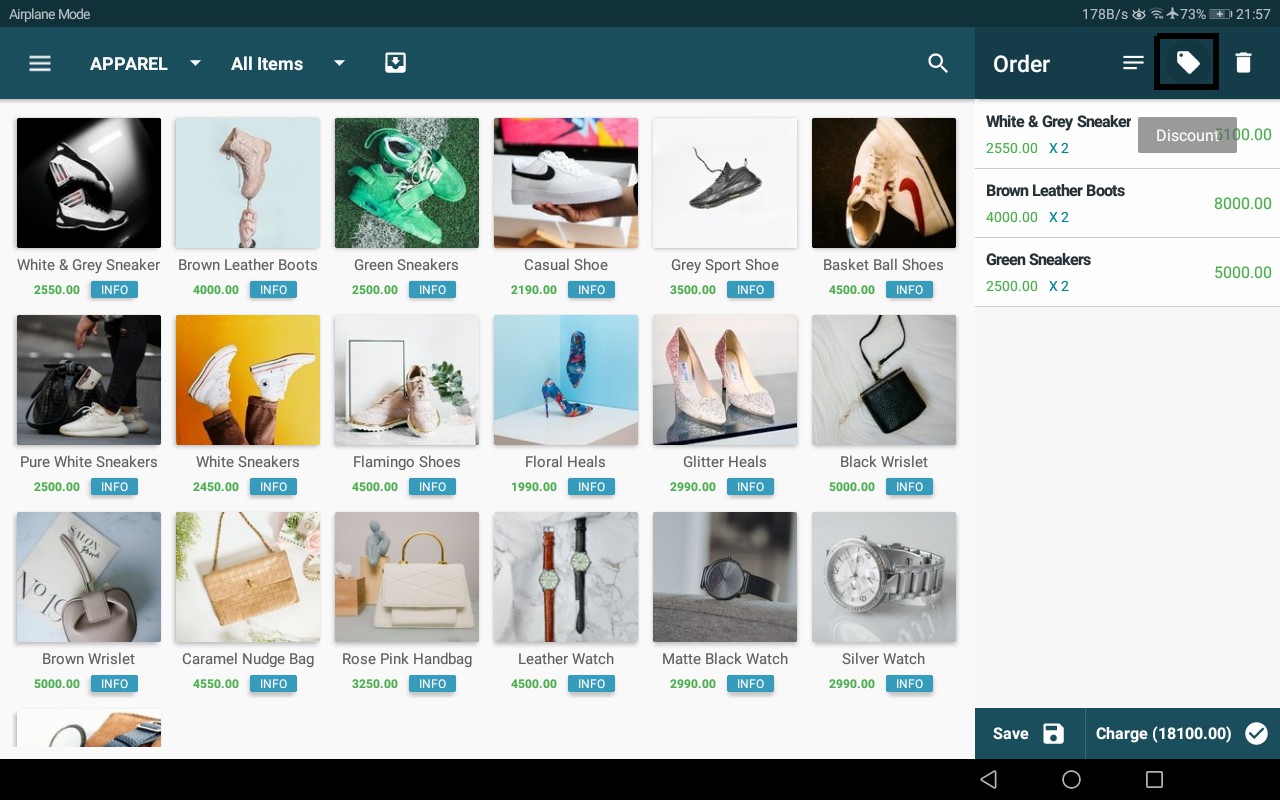
In case the user wants to offer a discount for a selected item, the user can simply use the tag icon appear after sliding the item row in the order pane to the left. If multiples of the item is selected in the order pane, the item wise discount will also multiply and apply to whole quantity selected.
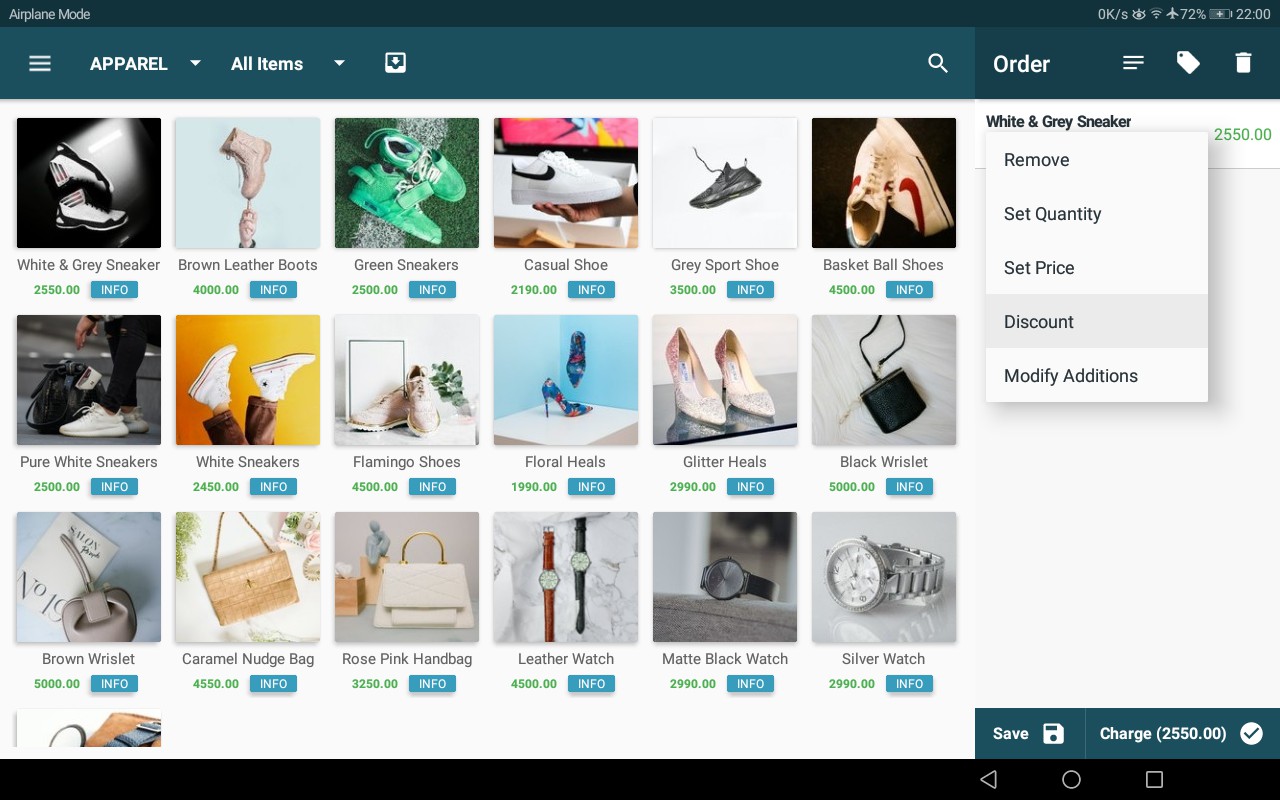
This action can also be performed from the options menu appear after clicking on the item orw in the order pane.
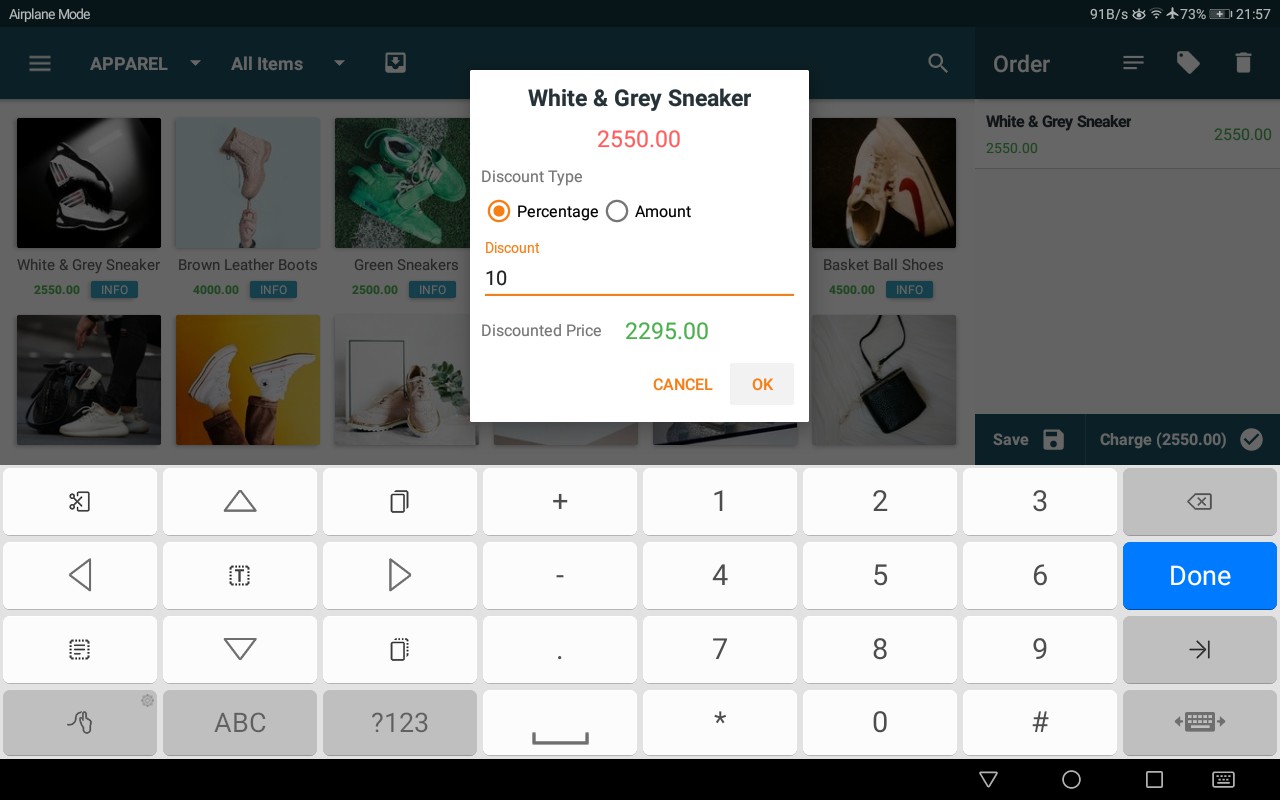
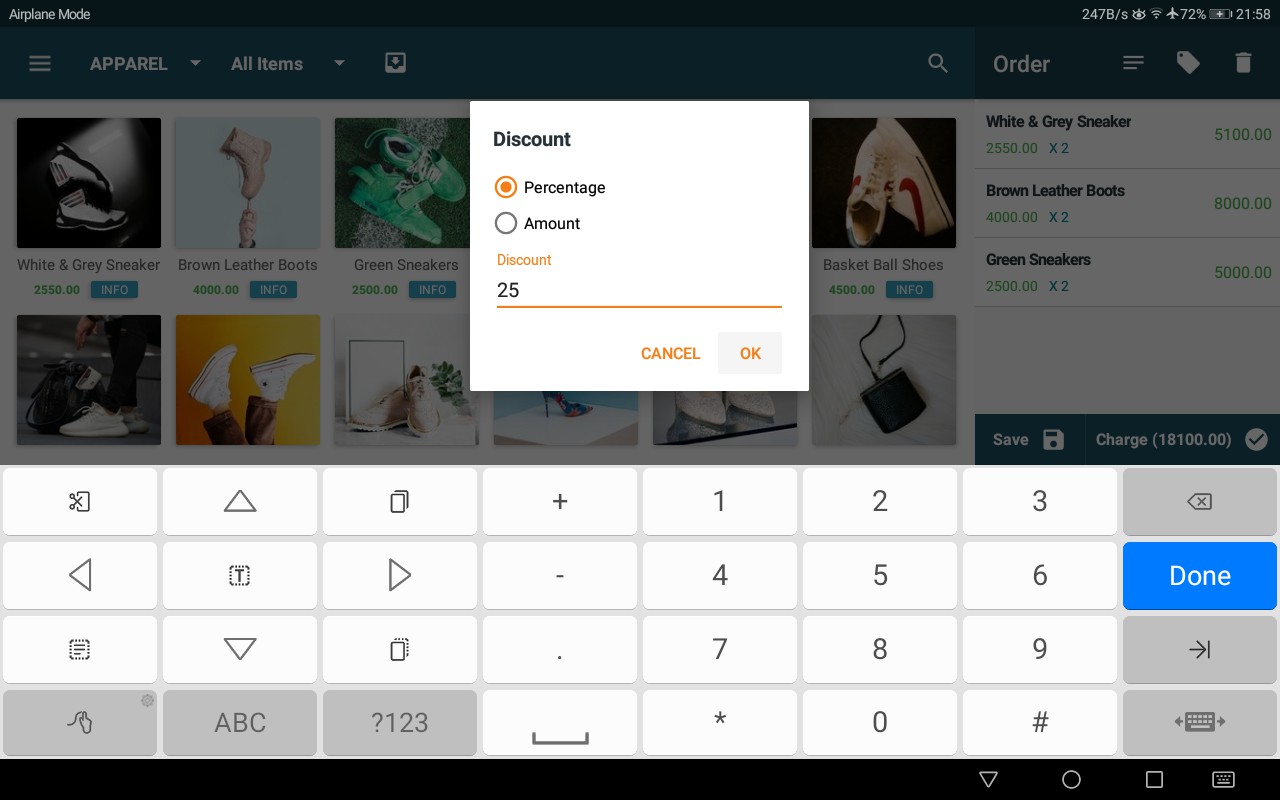
Once the user clicks the discount option a pop up will show on screen, asking the user to enter either the percentage or the amount the user wishes to offer as a discount. After filling in the discount, the user can simply click "ok" and see the discount being added to the item.
Entering percentage discount:
Percentage discount applied:

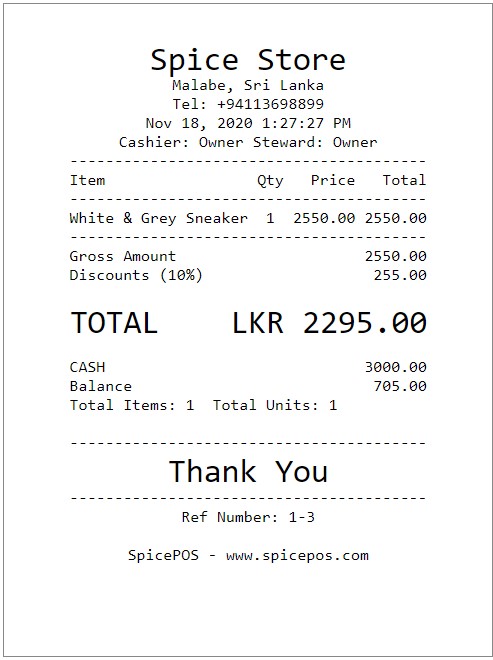
An item level percentage discount is displayed in receipt as below:
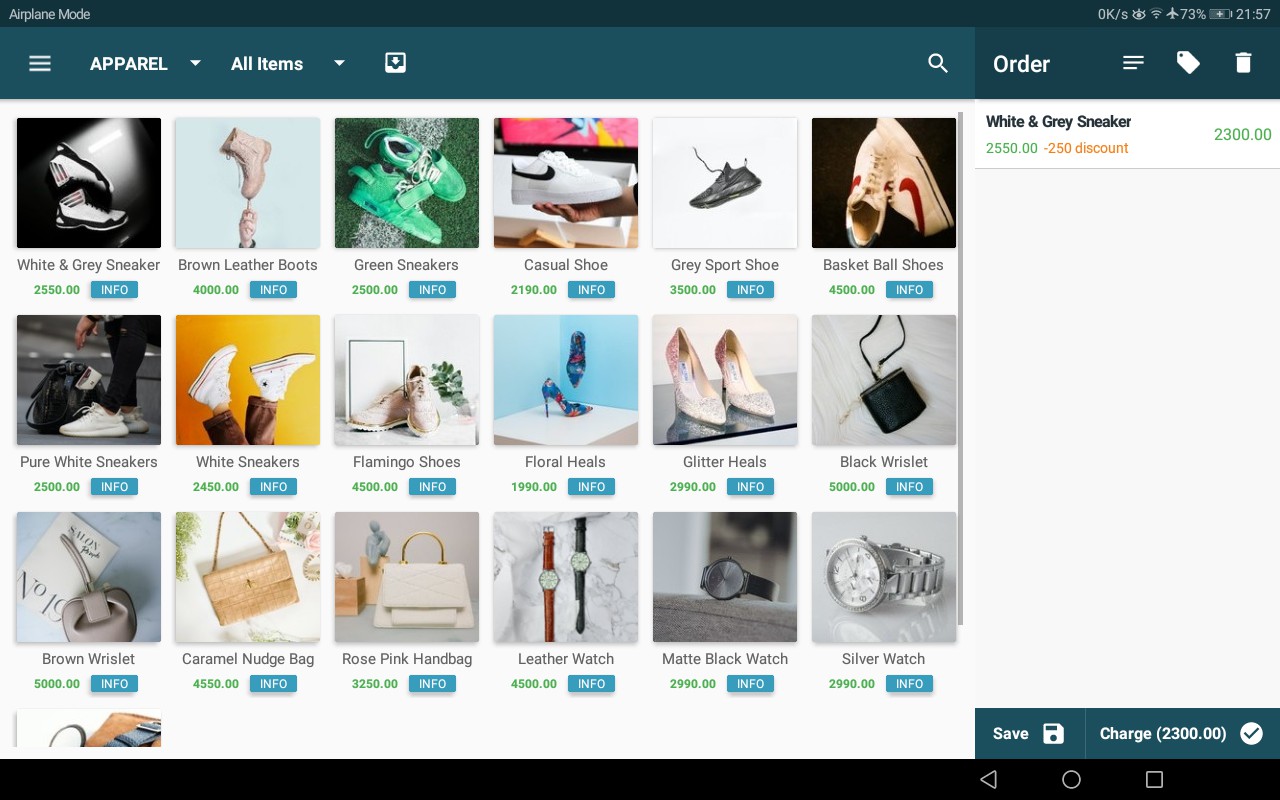
Entering amount discount:

Amount discount applied:
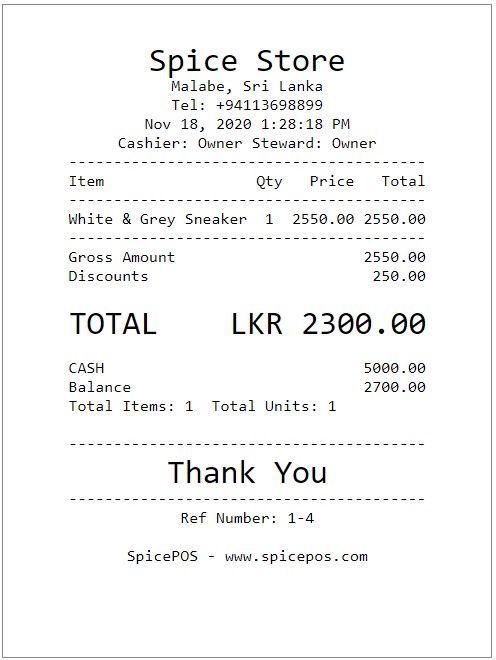
Item level amount discounts are displayed in receipt as below:
Bill Level Discount
An authorized user is allowed to give a discount to the total amount of the bill with a single tap on the tag icon on the top right.
Once clicking the icon, a pop up will show on screen, asking the user to enter either the percentage or the amount the user wishes to offer as a discount. After filling in the discount, the user can simply click "ok" and see the discount being added to the bill.
Entering percentage discount:
Percentage discount applied:
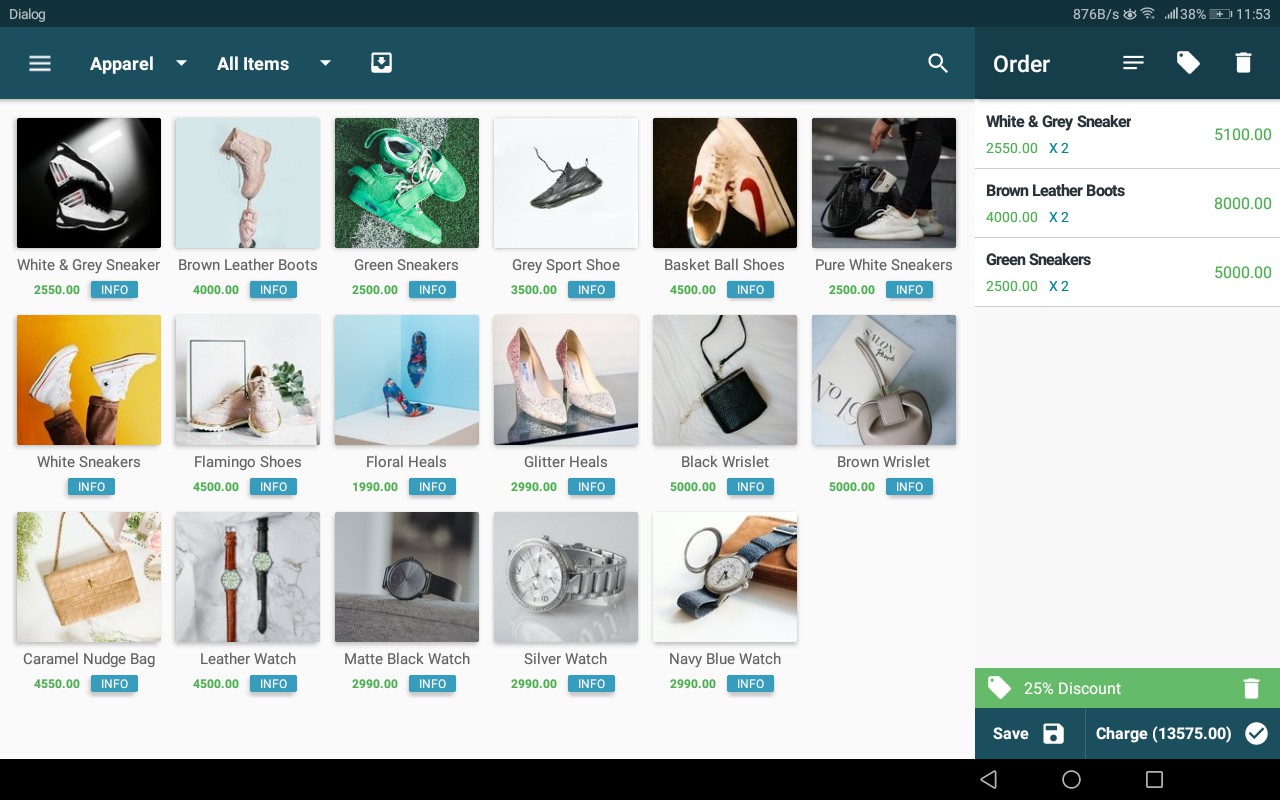
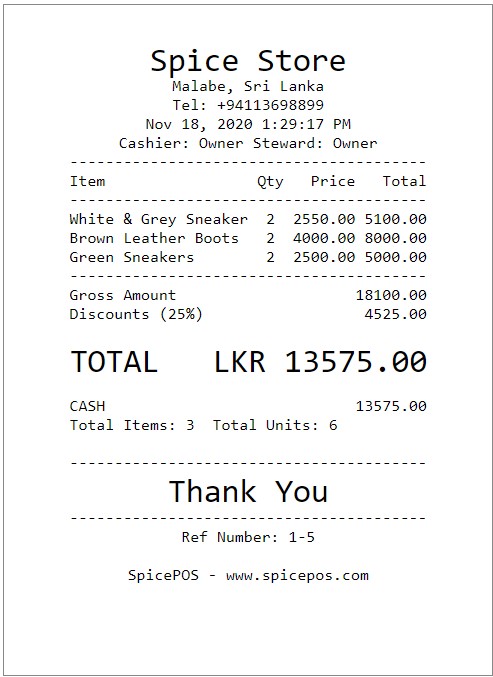
A bill level percentage discount is displayed in receipt as below:
Entering amount discount:
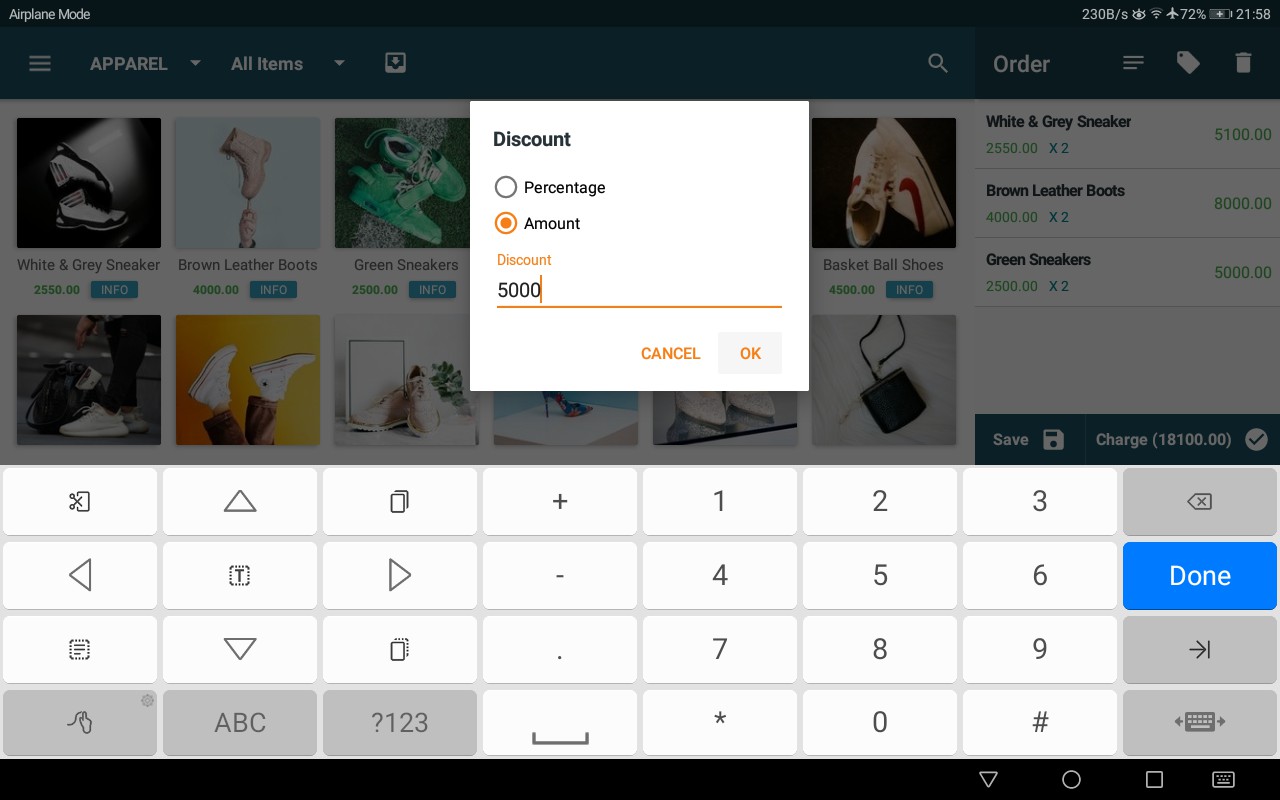
Amount discount applied:

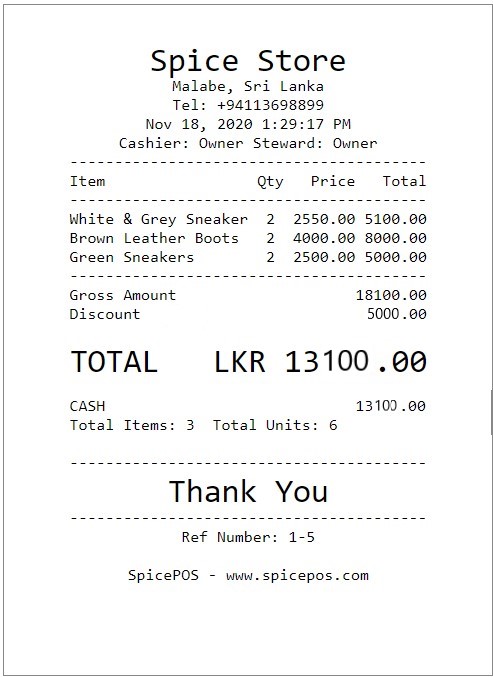
A bill level amount discount is displayed in receipt as below:
Automatic Discounts (Promotions)
Automatically applied discounts are set up from back-office. ex: buy 1 get 1 free discount Discounts for bill value exceeding a particular amount etc
Automatic discount setup is described under the topic items.
Once an automatic discount is applied on a bill, it will automatically appear in order pane in the corresponding place (in bill level or item level). When the discount is in the form of giving free issues, those free issued items will be shown with price zero. If such free items are not yet added to the bill, a suggestion will be shown in order pane.
Automatic discounts applied to a bill will be printed as a separate section in the final receipt and pre receipt.
