Setup Item Groups
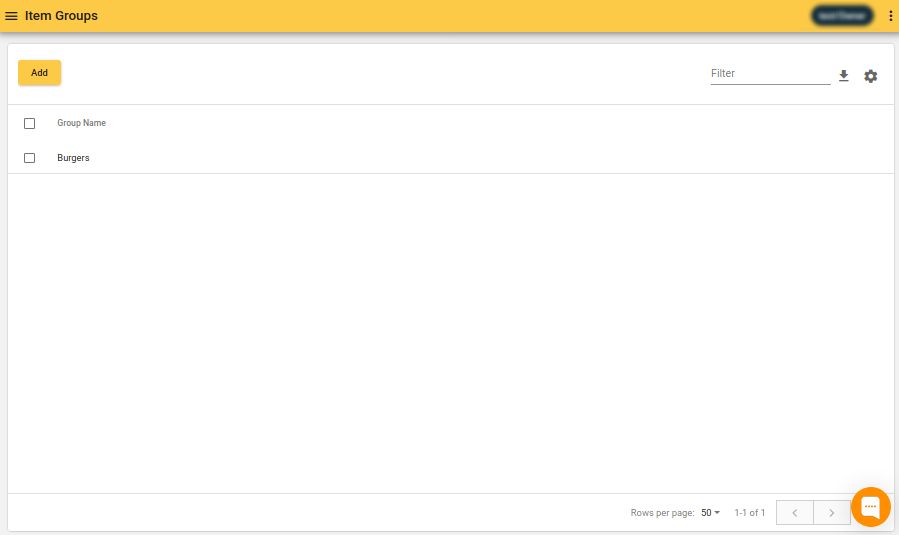
Multiple items can be selected to form an item group. Item groups can be easily switched in POS app, so locating an item through a touch becomes easy. A particular item can be included in multiple item groups.
Side Navigation Menu -> Master Data -> Item Groups
| Locate item groups screen from side nav | Additions screen |
|---|---|
 |  |
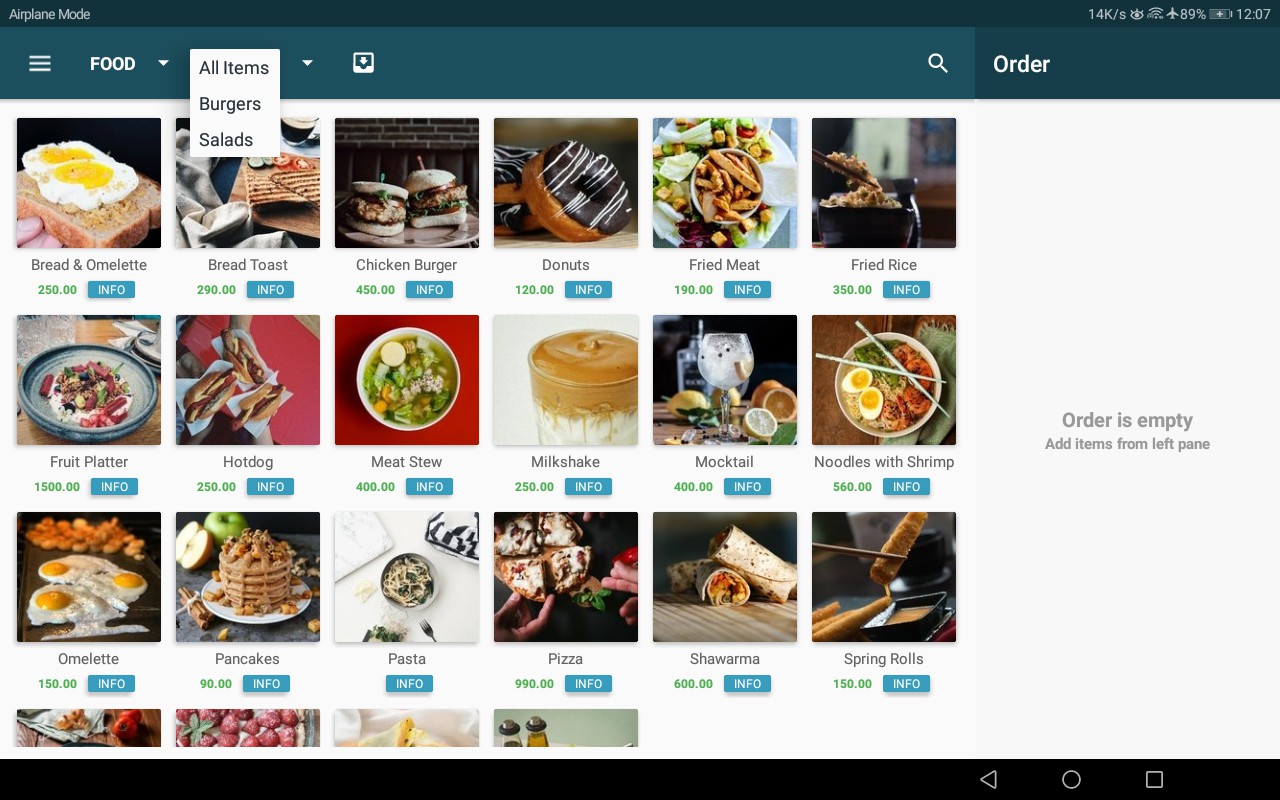
Item group drop-down in POS screen looks like below. Once an item group is selected, only the items belonging to that item group will be displayed in POS order taking screen. Only the categories which have items within that item group will be displayed in categories drop-down.
Add New Item Group
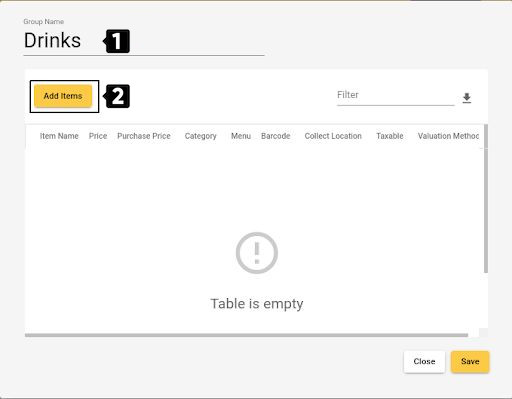
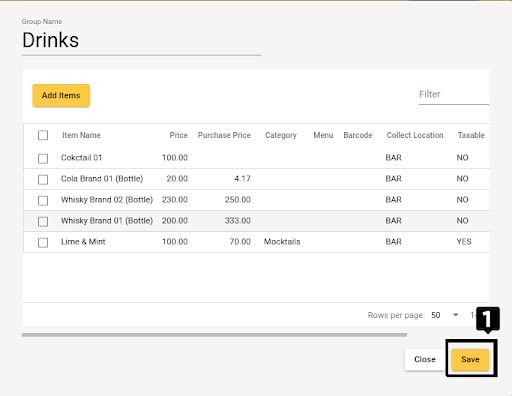
Item Groups Screen -> Click Add button -> Enter Item Group Name and Choose Items -> Save
Enter item group name & add items:
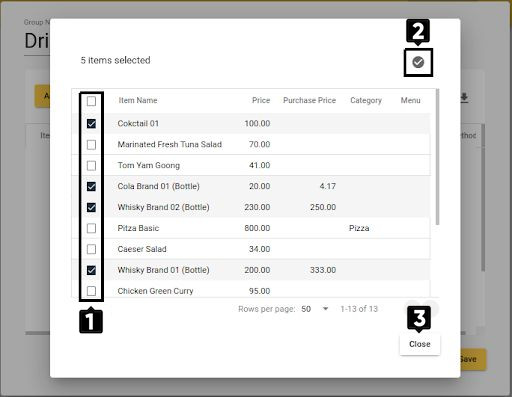
Select items & confirm selection:
Save to create item group:
Edit Item Group
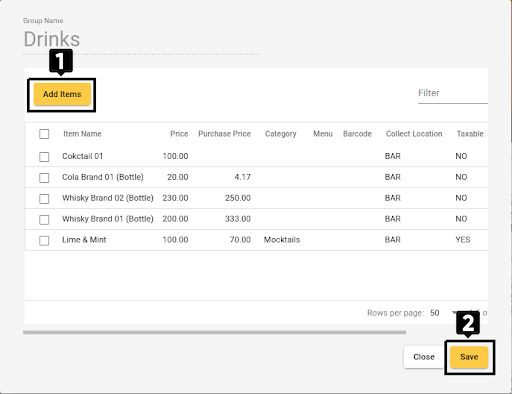
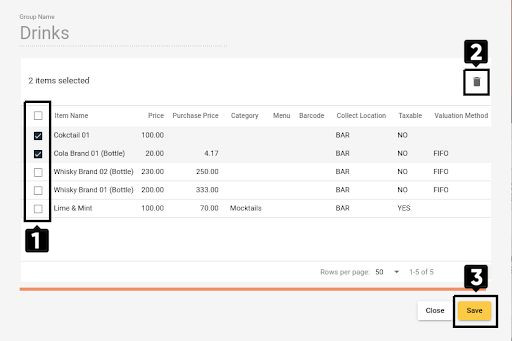
Item Groups Screen -> Click on the Item Group -> Add/Remove Items -> Save
Then add more items or remove existing items from the list and save.
Note
But can’t change group name. To change group name, item group should be deleted and a new item group should be added.
Add more items to item group:
Remove items from item group:
Delete Item Group
Item Groups Screen -> Select Item Group -> Click Delete icon -> Confirm
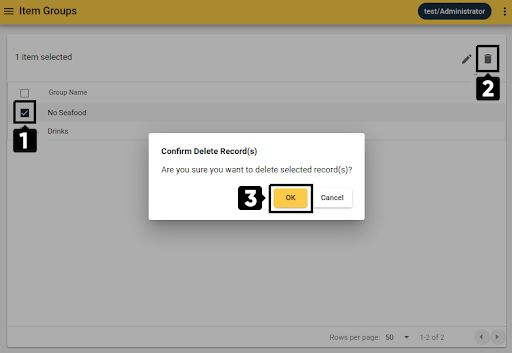
Upon deletion, item group will no longer be visible in POS app. But the items inside the item group do not get deleted by this action. Only the grouping is deleted.
