Create Purchase Order
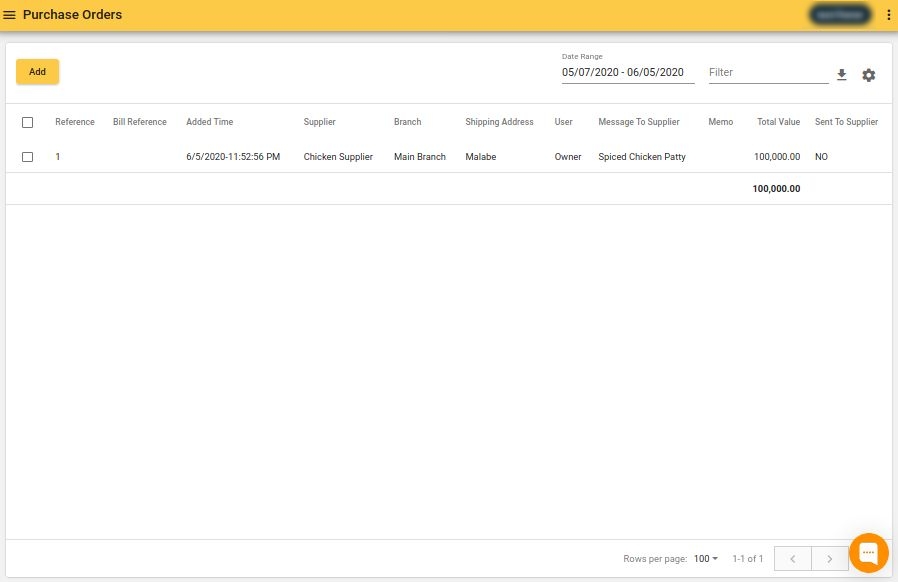
Purchase Orders View
Purchase Orders are used for ordering from the Suppliers of the business. You can create and send purchase orders to the Suppliers as an email or a printed note.
Back-Office -> Side Nav -> Inventory -> Purchase Orders
| Locating purchase orders screen | Purchase orders screen |
|---|---|
 |  |
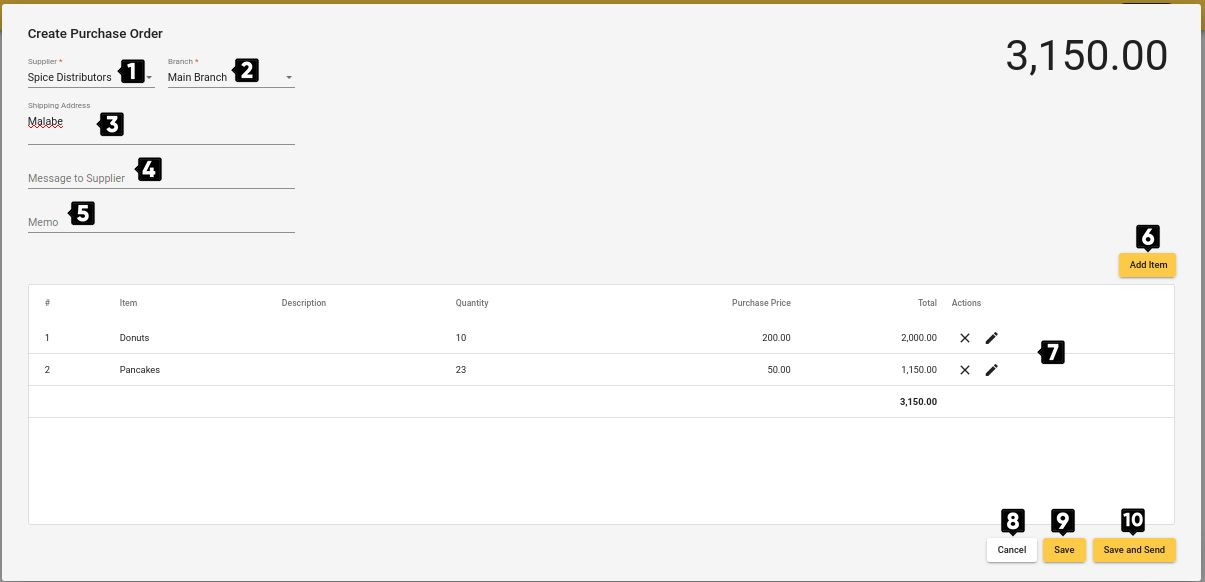
Create Purchase Order
Purchase orders screen -> Click "Add" button -> Fill in details -> Save
Purchase order add screen:
| Number | Field Name | Description |
|---|---|---|
| 1 | Supplier | Select supplier from the list. Suppliers defined in the system are shown here. |
| 2 | Branch | Branch for which the items are ordered. |
| 3 | Shipping Address | Shipping address of the goods. By default filled with the address of the ordering branch specified above. Can override if required. |
| 4 | Message to Supplier | Optional message to the selected supplier. Used for sending instructions for the supplier. |
| 5 | Memo | Official message to the supplier. |
| 6 | Add Item button | Add item to the purchase order. Functionality of the Add item popup is described below. |
| 7 | Item List | Purchase order items list. |
| 8 | Cancel | Cancel saving purchase order. |
| 9 | Save | Save purchase order so that it can be sent to the Supplier later, either as an email or as a printout. |
| 10 | Save and Send | Save the purchase order and send it as an email to the supplier. |
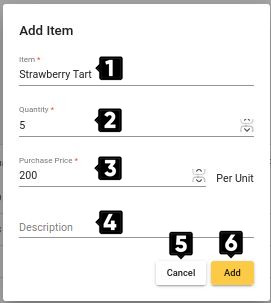
Add items popup:
| Number | Field Name | Description |
|---|---|---|
| 1 | Item | Name of the item to be added to the purchase order. |
| 2 | Quantity | Quantity to be ordered. |
| 3 | Purchase Price | Previously bought Price or the intended buying price. Will be auto picked from purchase price field of the item. |
| 4 | Description | Optional description - instructions on packaging or selecting products. |
| 5 | Cancel button | Cancel adding the specified entry to the Purchase Order. |
| 6 | Add button | Add specified entry to the purchase order. |
"Save and Send" option is described under the upcomming topic "Actions on Purchase Orders".
Once the save button is clicked, the purchased order will be saved in the system with a new reference number.
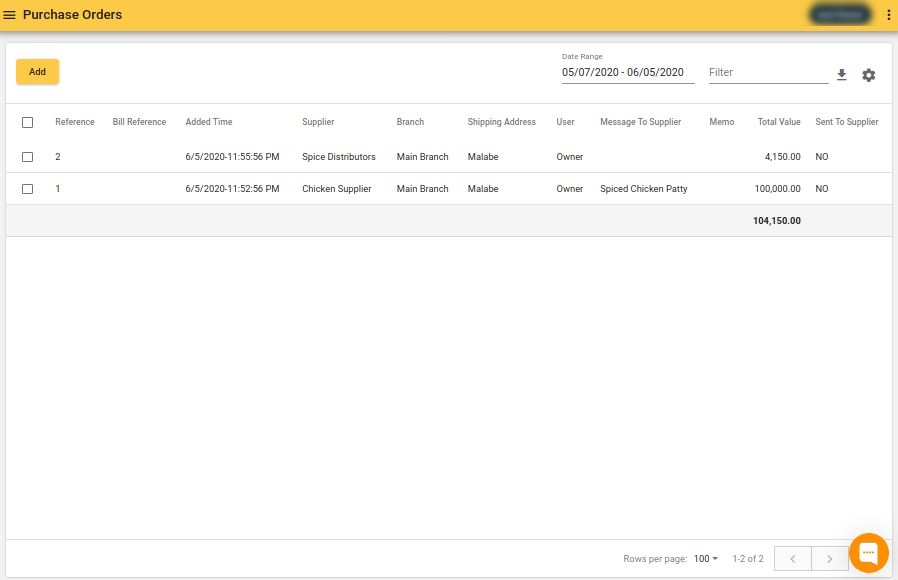
Note: No changes in inventory happen because of a purchase order since it's just a request from supplier to send goods rather than receiving them physically.